Venture BigCommerce Theme is a multi-purpose theme that can be used for any type of online store. Venture theme is tested by bigcommerce and Built with Stencil framework, latest version, and update to date. Compatible with BigCommerce latest version.
Venture theme also supported various features of bigcommerce like mobile friendly, Google AMP, Schema data, Various applications supported, Page builder, Theme editor, Sidebar, Mega menu, Carousels, Newsletters, banners etc. We have tried to help our client with the documentation with a detailed explanation.
Header & Footer
In your control panel, go to Storefront > My Themes, and click the blue "Customize" button to launch Theme Editor.
In the left hand column of the Theme Editor, click the panel labeled 'Header & Footer'.

Pencil Banner
Hide Pencil Banner:If checked, it will hide a pencil banner, i,e.Shop 35% on your first.
Pencil Banner Text:pencil banner text that will be visible in all pages. Here, Shop 35% on your first.
Pencil Banner Link Text:Add Link text in Pencil Banner Link Text. i.e. Shop Now.
Pencil Banner Link:Add Link in Pencil Banner Link.
Pencil Banner Text Color:Add text color in pencil banner text color.
Pencil Banner Background color:Add Background color in pencil banner Background color..
Logo
Logo position:aligns the logo left, center or right. Applicable for both image and header content.
Logo Center View :
Logo Left View :
![]()
Logo Right View :
![]()
Header

Header Style:Set header style Normal or Sticky.
Header Background color: Set background color. It will appear behind the Logo.
Show Compare:Toggles the visibility of Show Compare.

Dropdown menu display mode: Change Dropdown menu display Mode Simple or Alternate
Simple Design:

Alternate Design:
 Navigation Menu Design: Change Navigation Menu design Simple or Compact
Simple Design:

Compact Design:

Footer

Newsletter popup:

Show Newsletter Popup:If checked, it will appear as a newsletter popup. if unchecked then the newsletter appears in the footer.
Newsletter Popup Image: Add Image path in Newsletter Popup Image

Footer Background color:Add color code in Footer background

Footer Blog link:Add Blog Link, it will be visible in footer.
Footer Email:Add email address, it will be visible in footer.
Footer Link Hover: Add footer link hover color.
Footer Link Color: Add footer Link color.
Copyright background Color: Add copyright background color.
Copyright Text Color: Add copyright text color.

Phone number:Add phone number in Admin Panel settings > store profile.
Home Page
In your control panel, go to Storefront > My Themes, and click the blue "Customize" button to launch Theme Editor.
In the left hand column of the Theme Editor, click the panel labeled 'Home Page'.

USP Section

Hide USP Section: Toggles the visibility of USP section.
Number Of USP Sections: set how many USP blocks you want to shown.
USP Background Color: Background color of USP Section.
USP Text:Change USP Title Text
USP SubText: Change USP SubTitle Text
USP Text Color: Change color of USP text.
USP SubText Color: Change color of USP text.
USP Border Color: Change the color of the border between two USP texts.
USP Images:
First, you need to head over to "Storefront > Image Manager" and then upload your images here.

Then once uploaded, click "View Full Size" to open the image in a new tab and copy the path to that image url

Then paste the image url into the category image input box:

Repeat these steps for each category image. Don't forget to give each category a title and a link. Also you can add subtitles.
Category Section

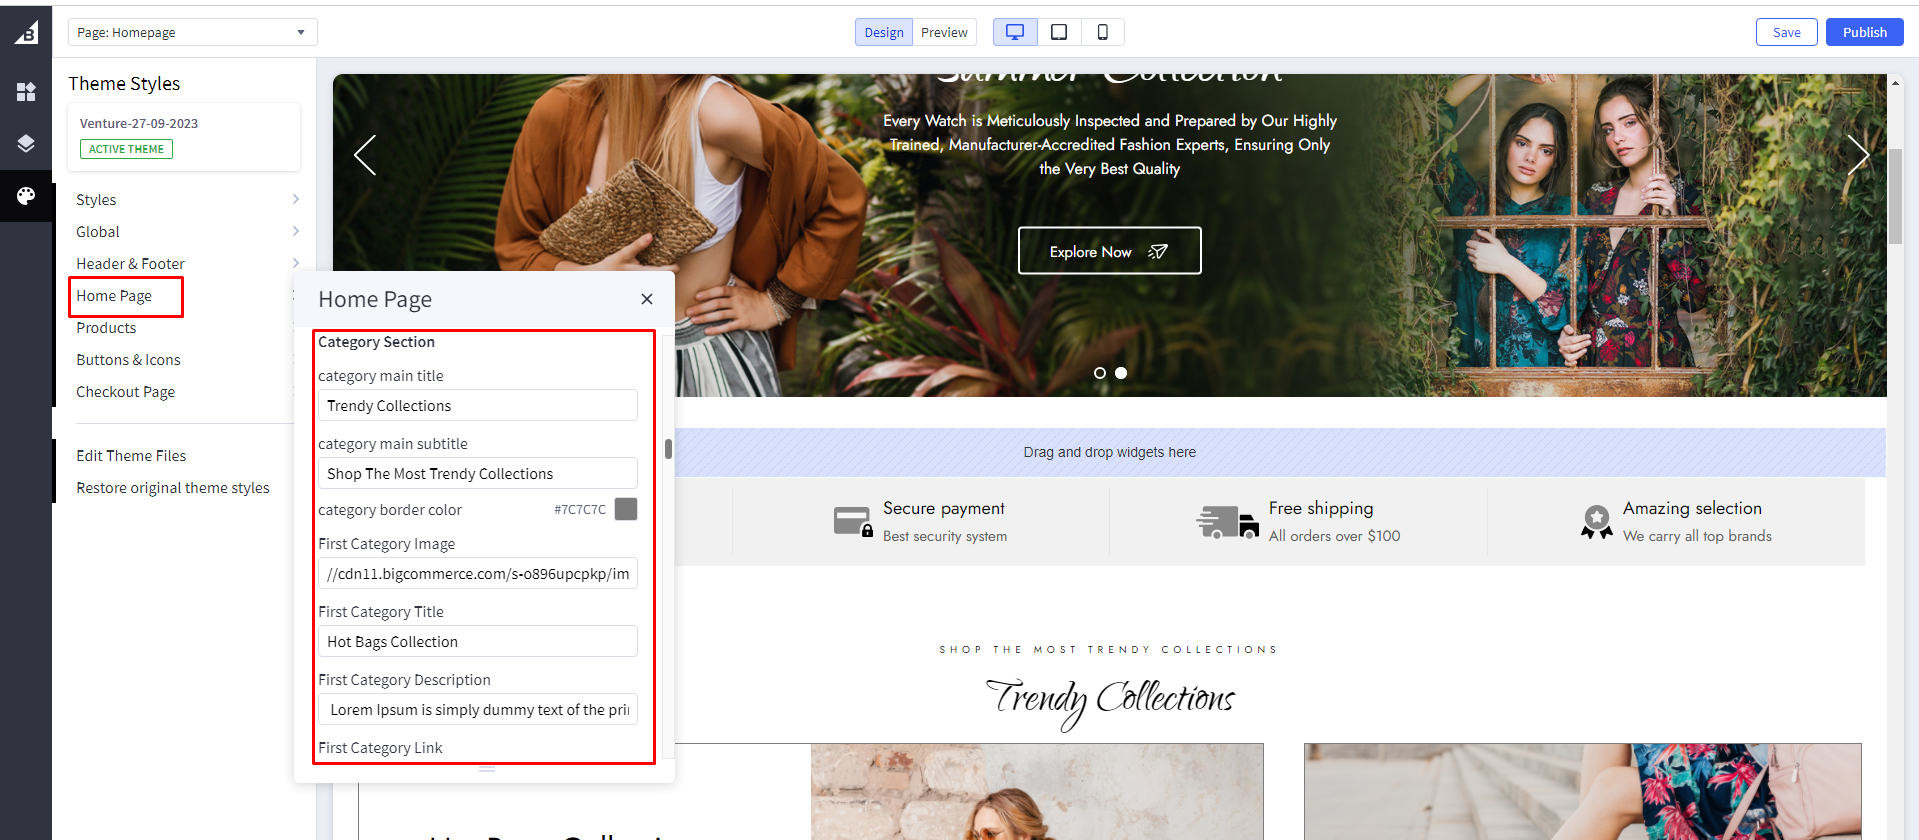
Category Image: Add image path in Category Image.
Category Title: Add category Title in Category Title.
Category Description: Add category Description in Category Description.
Category Link: Add category Link in Category Link
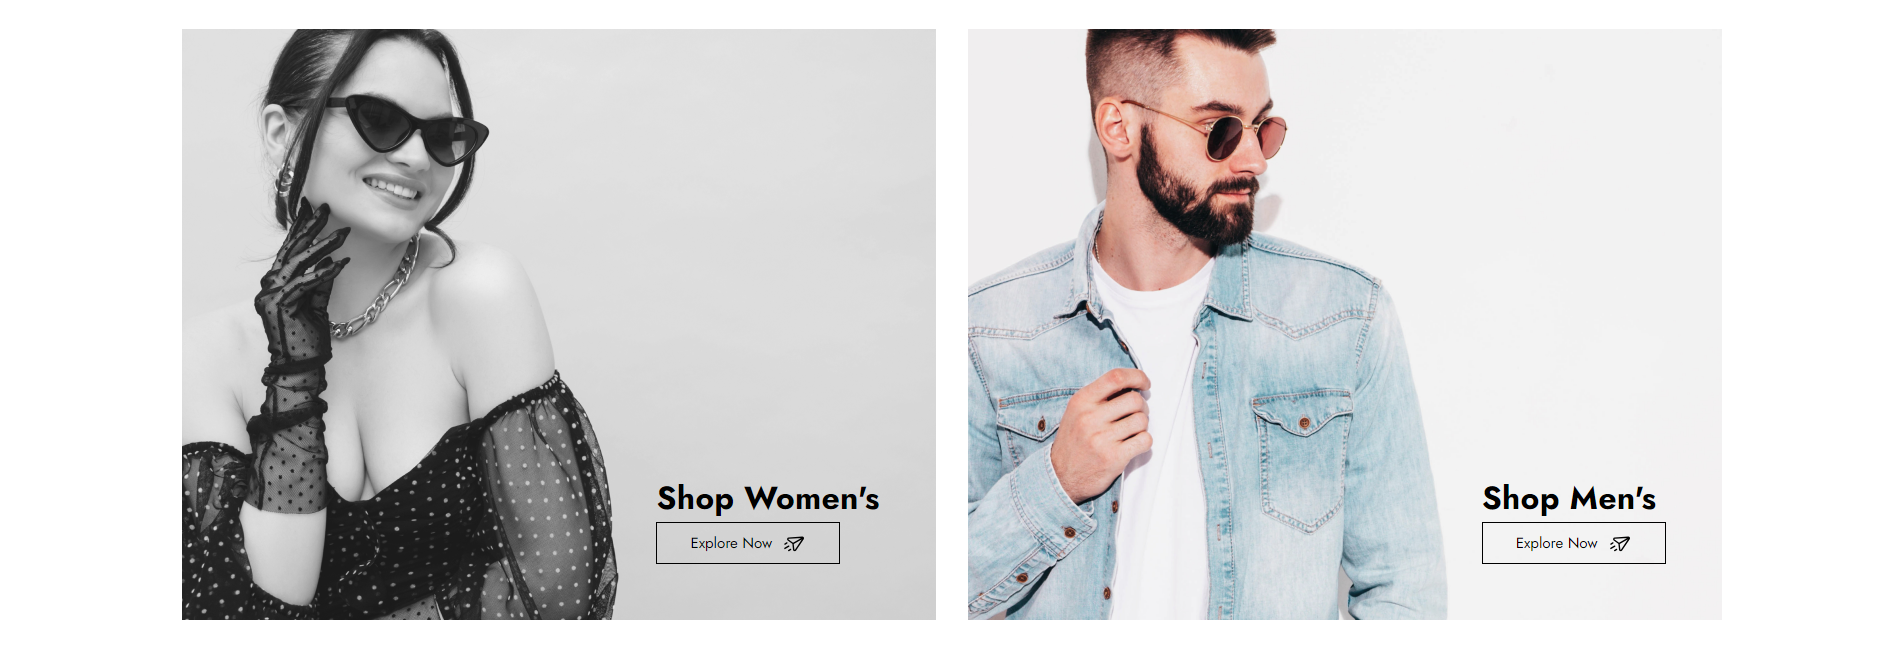
Banner Category Section
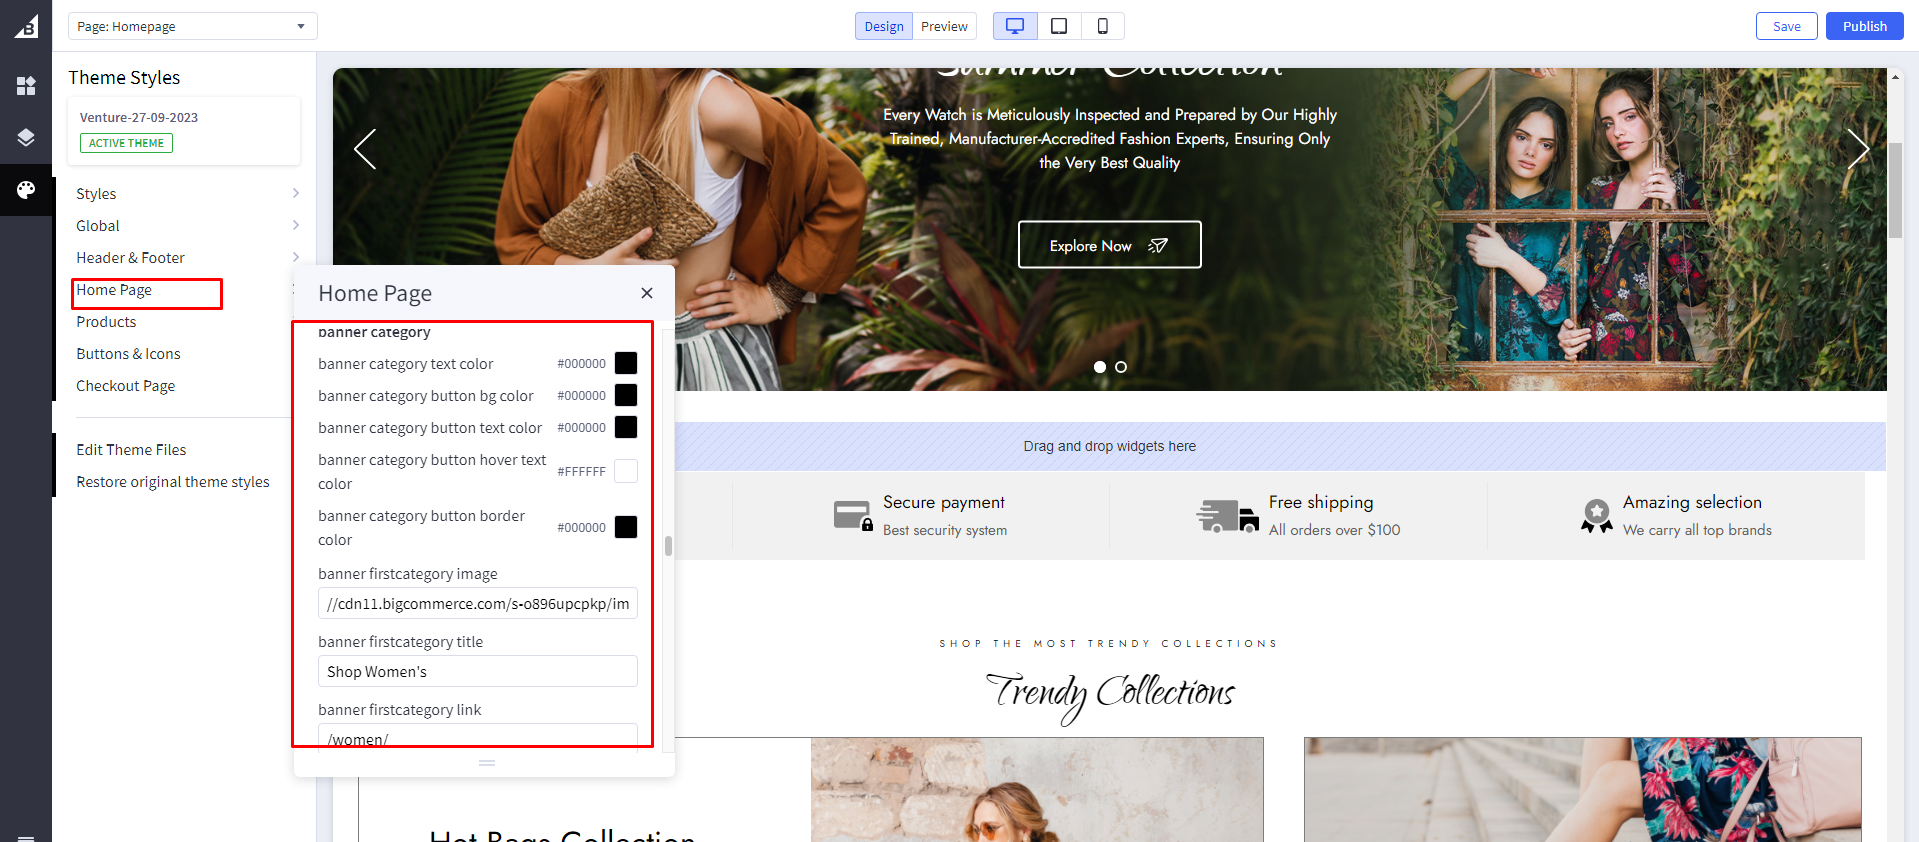
Banner Category Text color: Change color of banner category text..
Banner Category button background color: Change color of banner category button background color
Banner Category button text color: Change color of banner category button text color
Banner Category button hover text color: Change color of banner category button hover text color
Banner Category button border color: Change color of banner category button border color
Banner Category Image: Add image path in Category Image.
Banner Category Title: Add category Title in Category Title
Banner Category Link: Add category Link in Category Link.
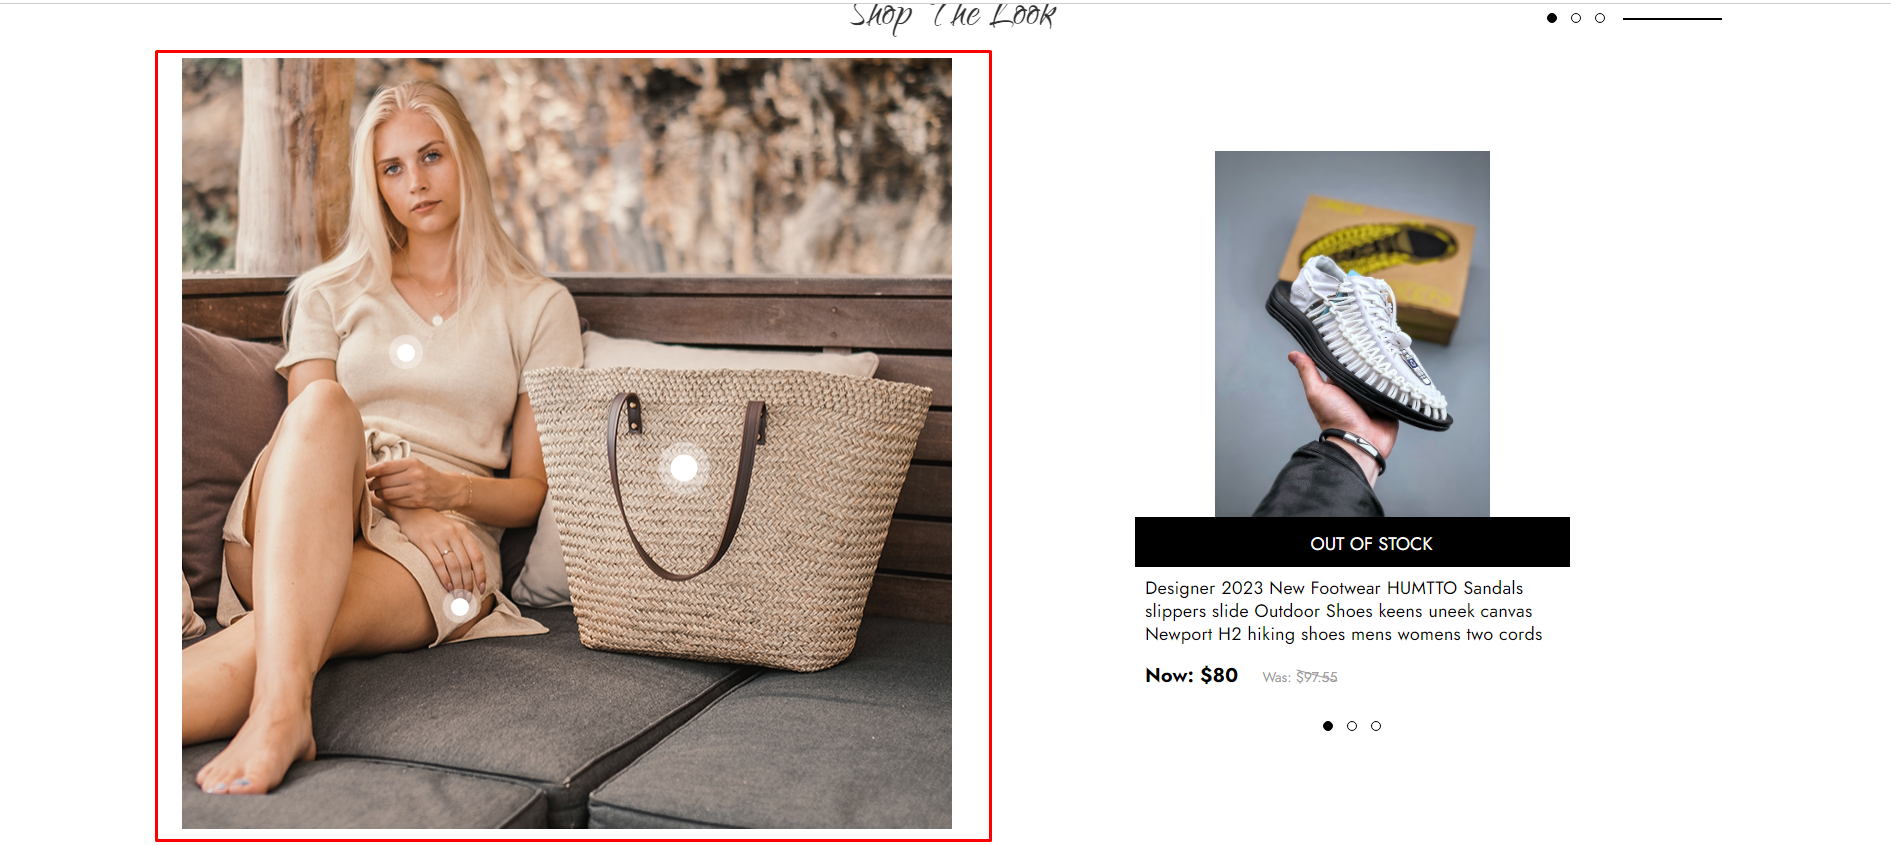
Shop the look section
If you Select Custom Products, You have to fill in details of product set options.
Hide shop the look section : toggle the visibility of Most Popular products section.
Shop the look product FirstSet:
First Main Image: paste the image path of left section image.Steps are same as mentioned above
First ProductID: Right click on the product image of a particular product you want to show in the right side section and open it in a new tab:
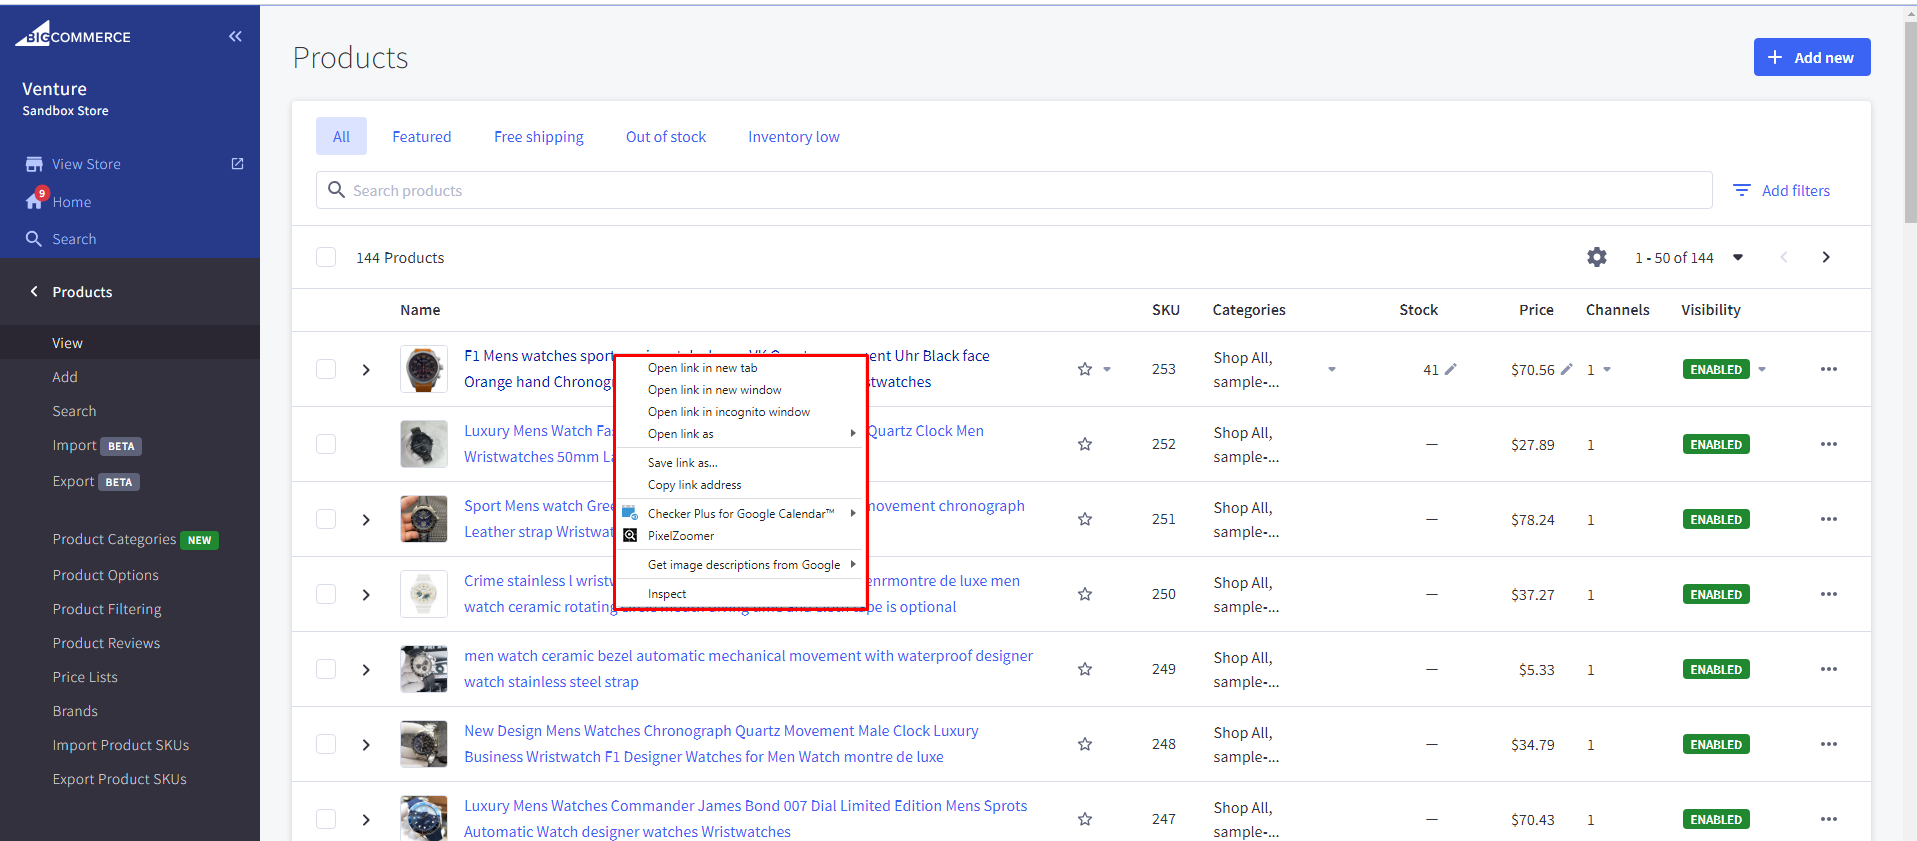
That image will open in a new tab. Find product ID right after "/products/" in the image URL.

Add that Product ID and dot positions in percentage(%) from top and left.

Similarly, you can add two more products to show on right side that will appear as a slider . You can add two more sets of images and products and that full section will appear as a slider.
Most Popular Display Mode: Select the Most Popular product display mode.
Default Mode View: 
Custom Mode View: 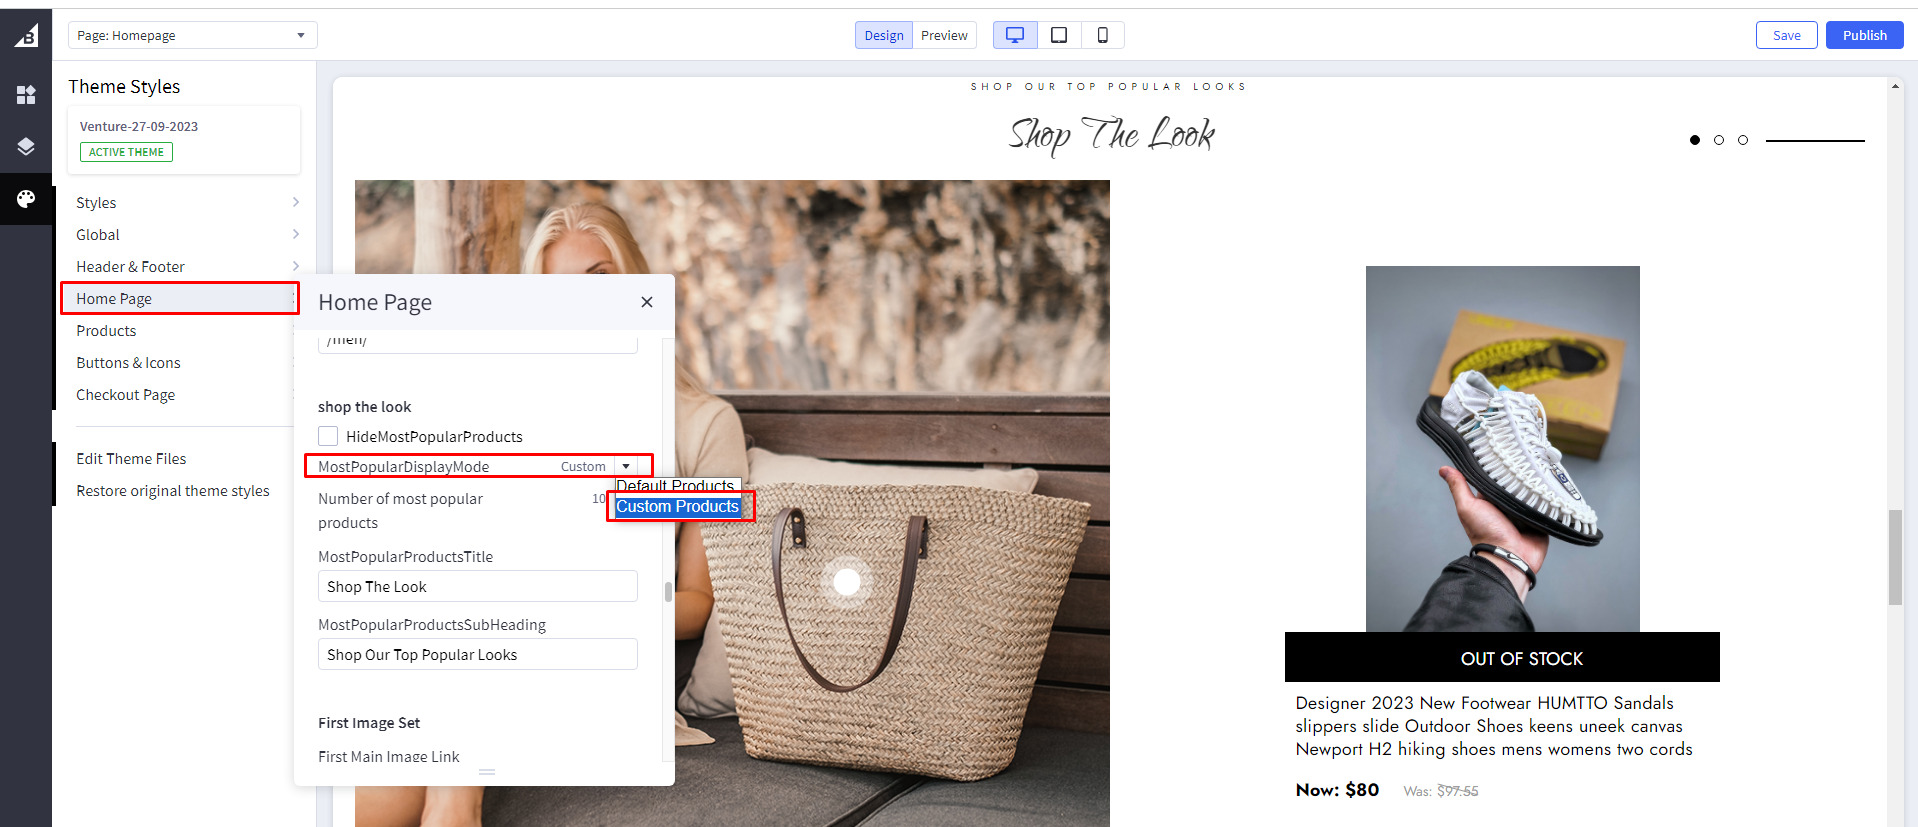
Brand Section

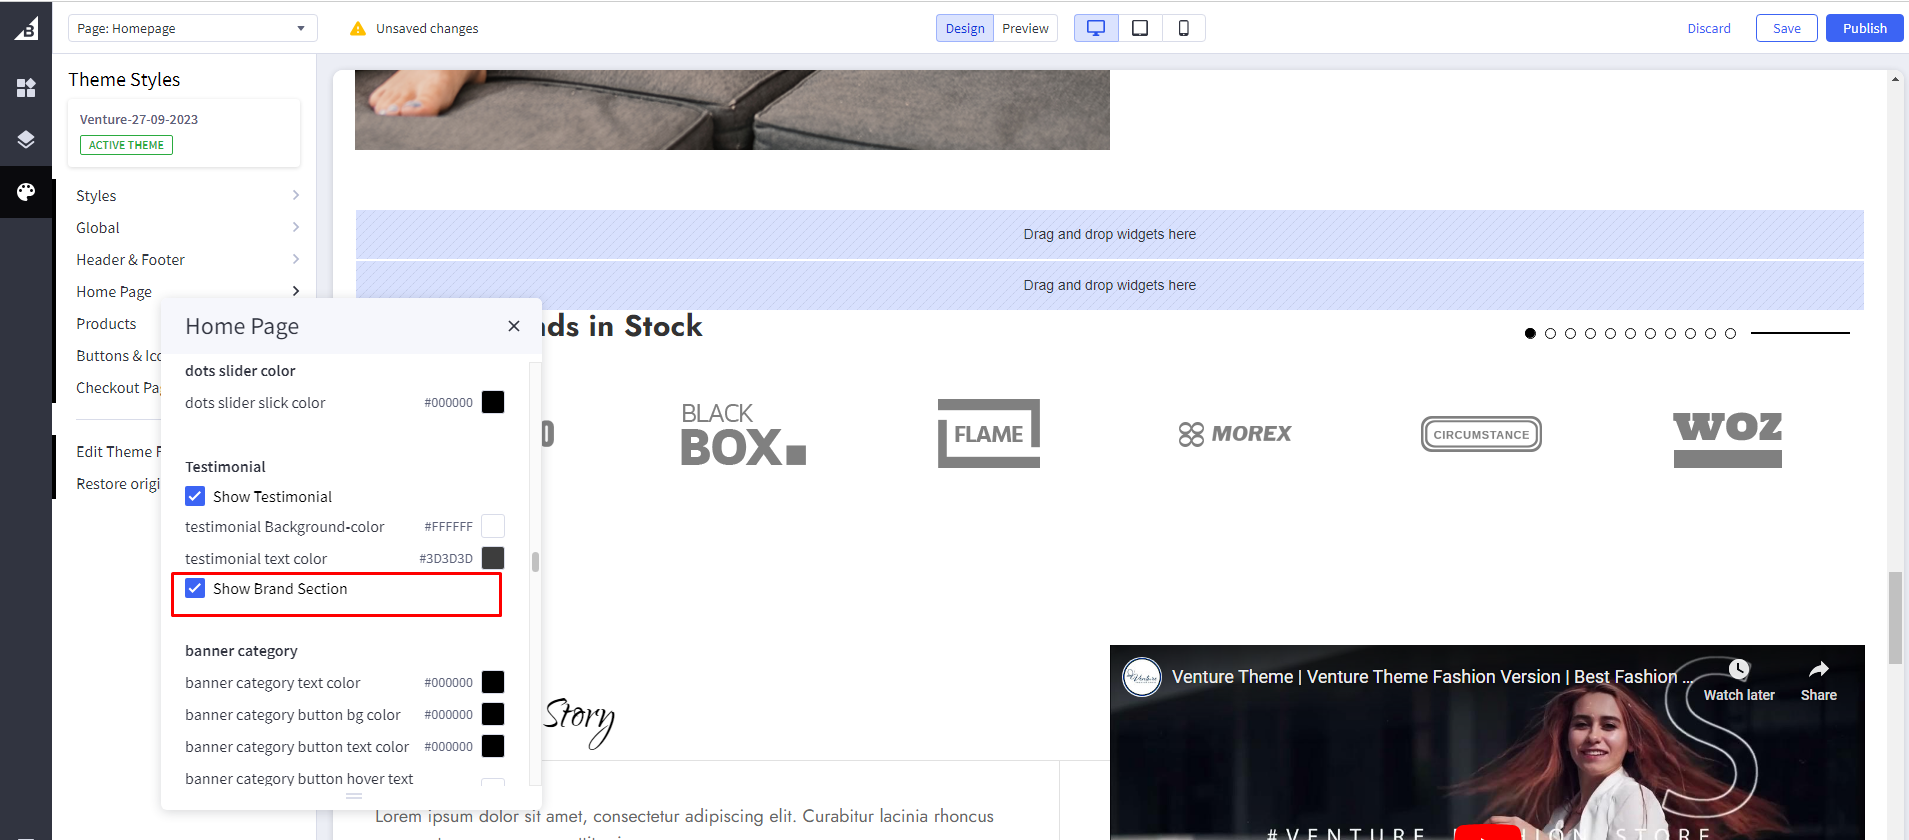
Show Brands section: Toggles the visibility of the Show Brand Section.
Add Brand Images: First, you need to head over to "Storefront > Image Manager" and then upload your images here.

Then once uploaded, click "View Full Size" to open the image in a new tab and copy the path to that image url.

Go to channels > Themes > Advanced > Edit Theme Files > lang > en.json. Then paste the image url in “brandsection” brandimage1 to brandimage8

Brand Section Heading: Add Heading in “brandsection” > heading.
Brand Link: Add brand image link in “brandsection” brand-link1 to brand-link8
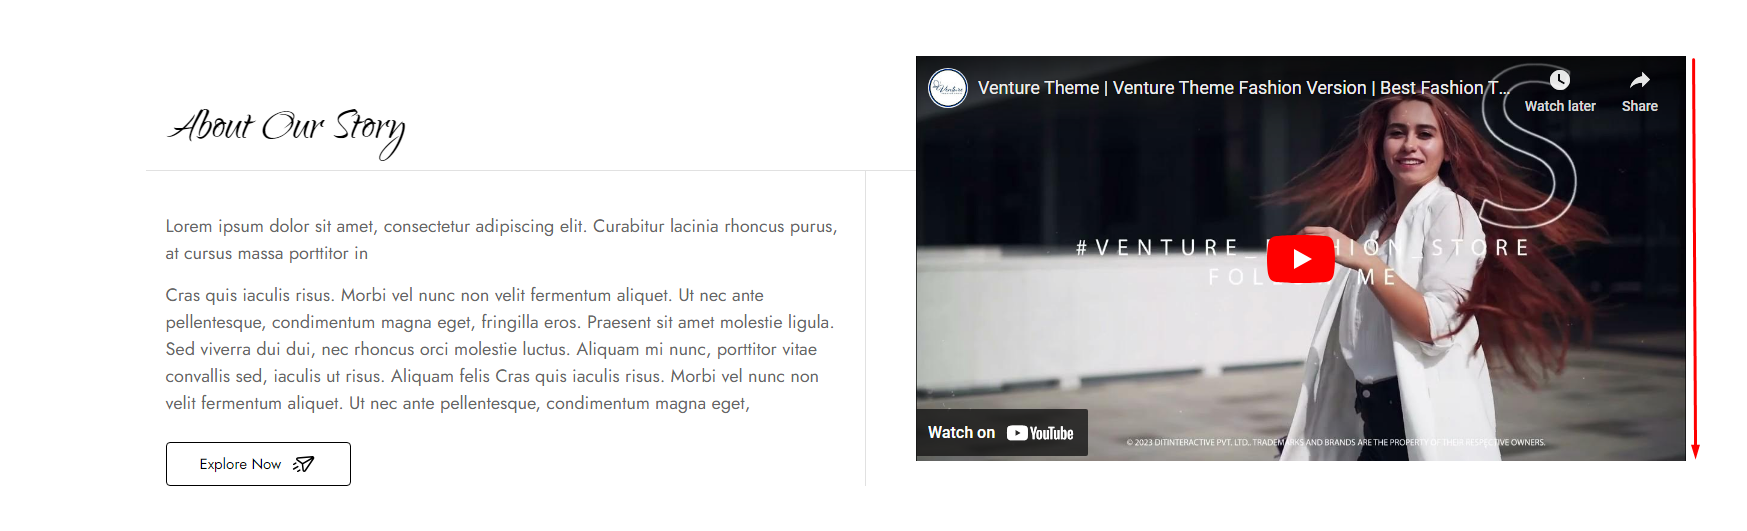
About Our Story
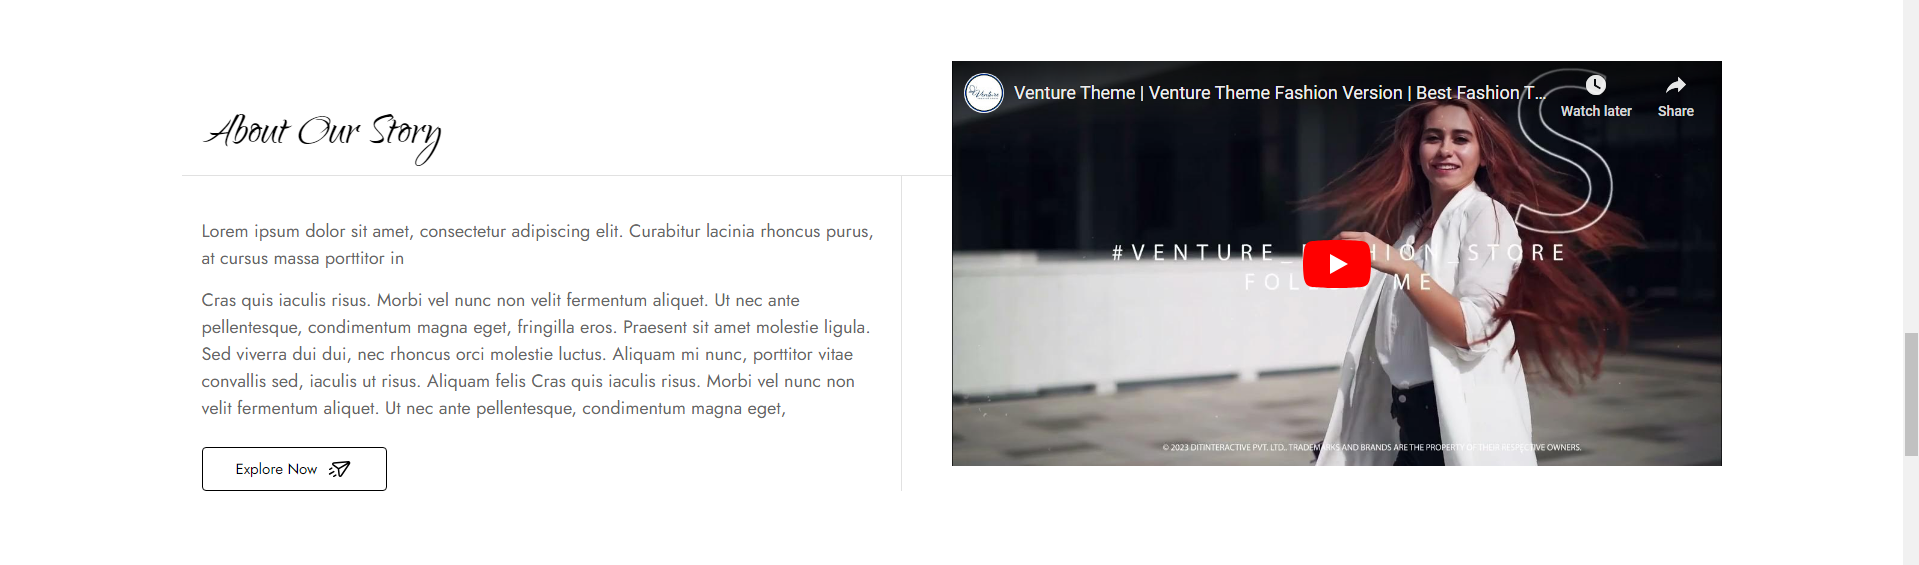
For About US Section, In your control panel, go to marketing > banners.
Enable / Disable About Our Story Section: marketing > banners. You can toggle the visibility of this section by clicking the icon under “Visible” Column.
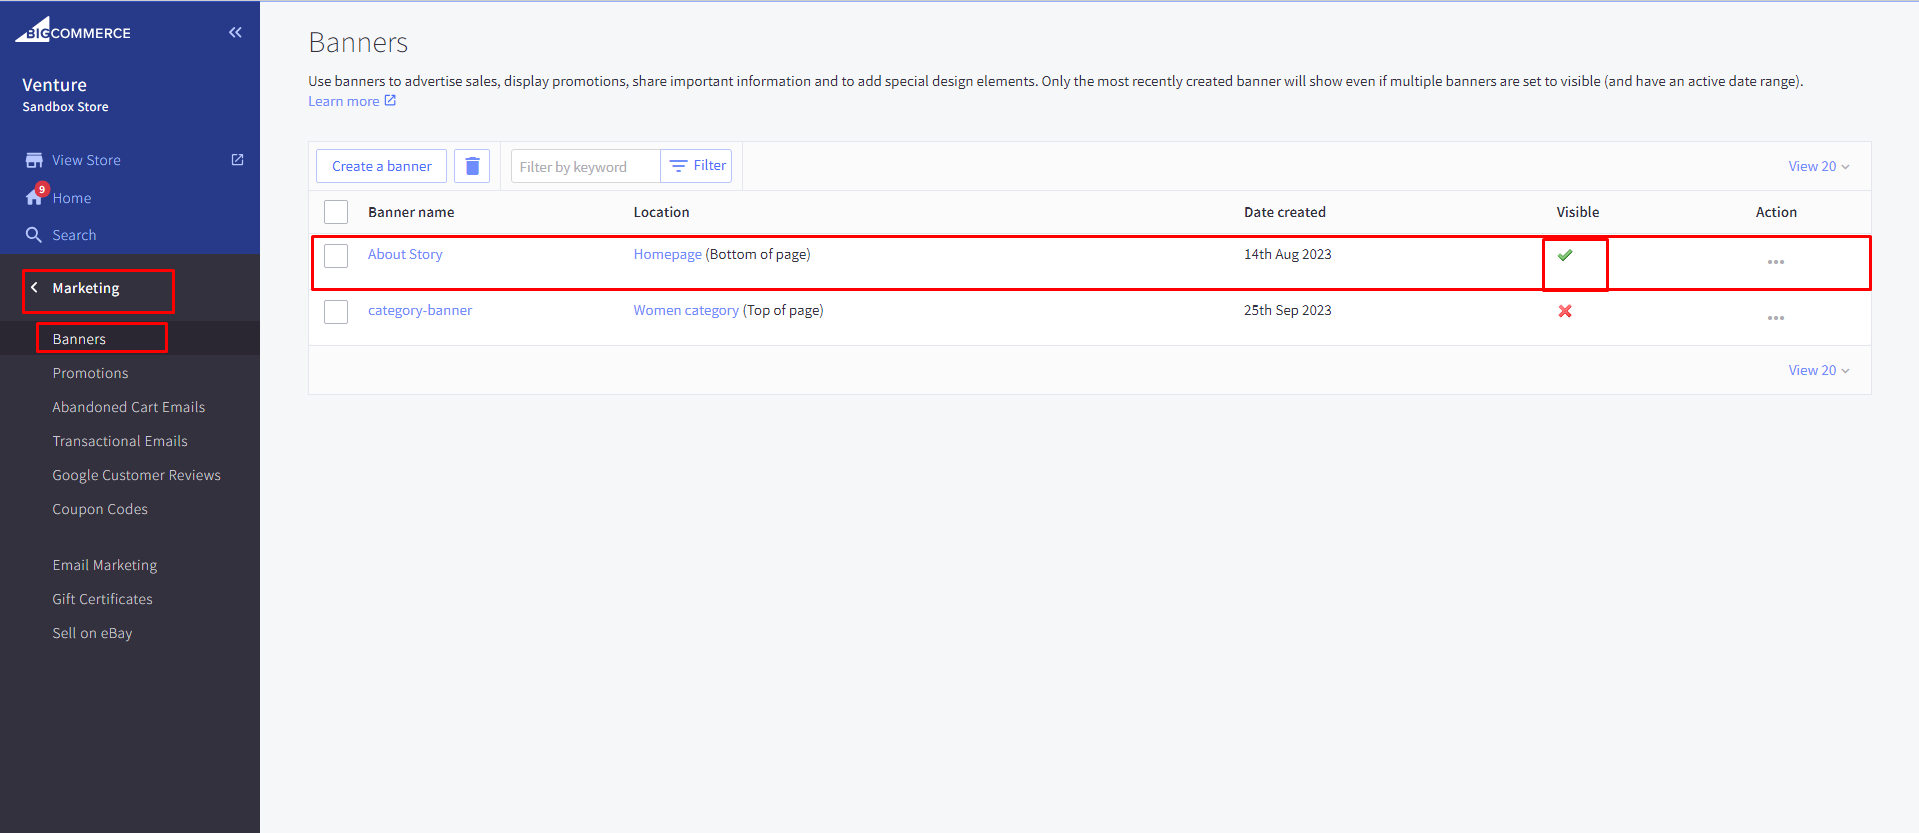
Edit About Our Story Section: To Edit About Section, click on the About story banner name.

Banner details will appear like this :

Then click on “Html” button on the header of the banner content window

“HTML Source Editor” popup will open.

Then you can edit Section Heading & Sub-heading, Description, Read more button text & redirection link. Also you can edit your video link or image.
Note: Don’t remove or edit html tags or class, it will change the design view of the section.
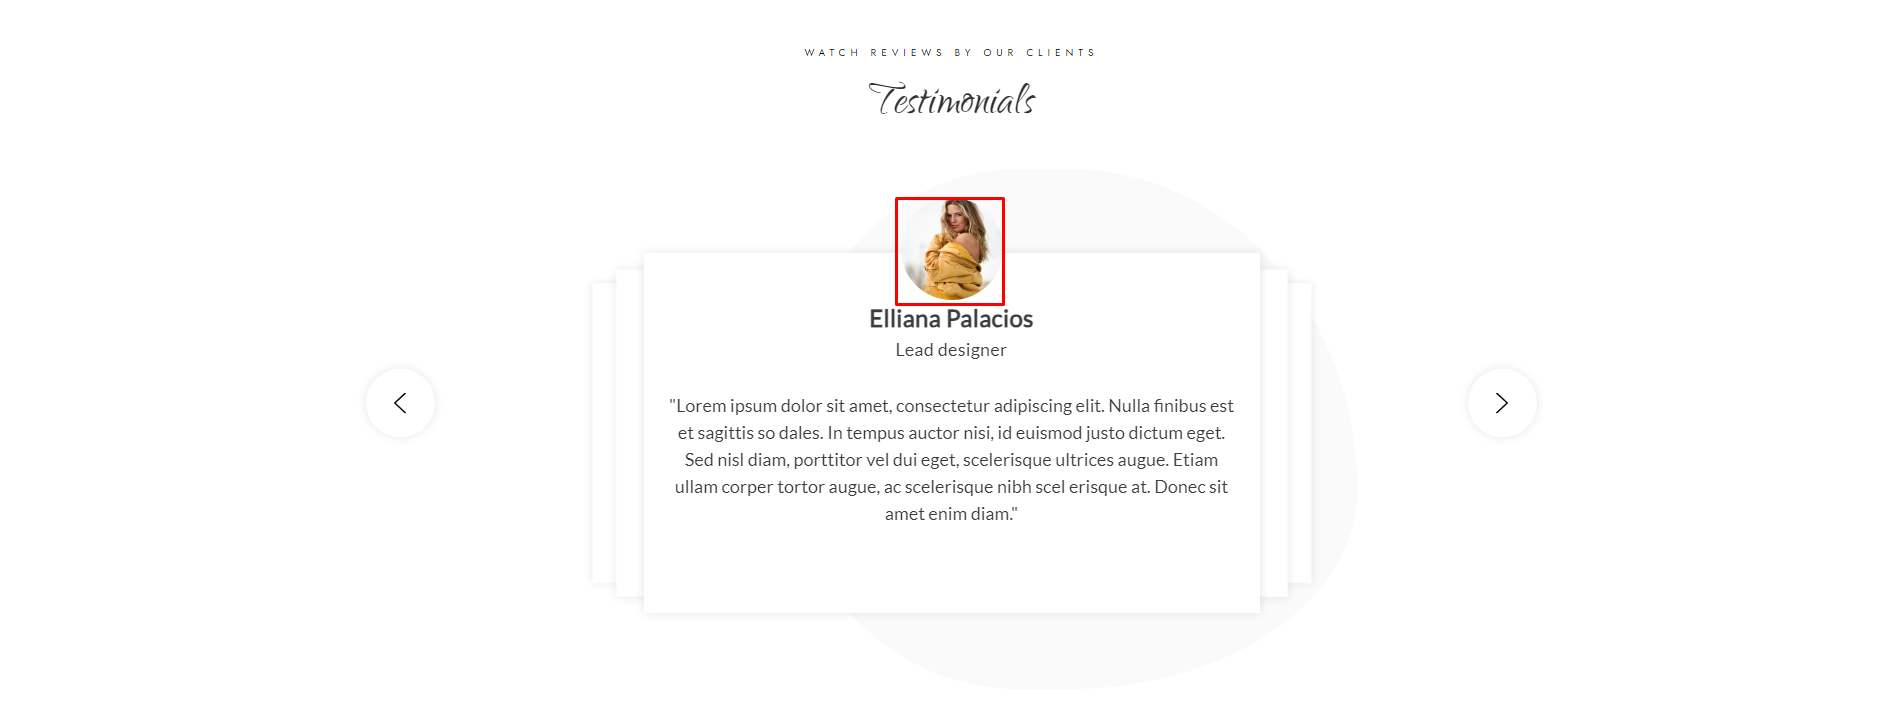
Testimonial Section
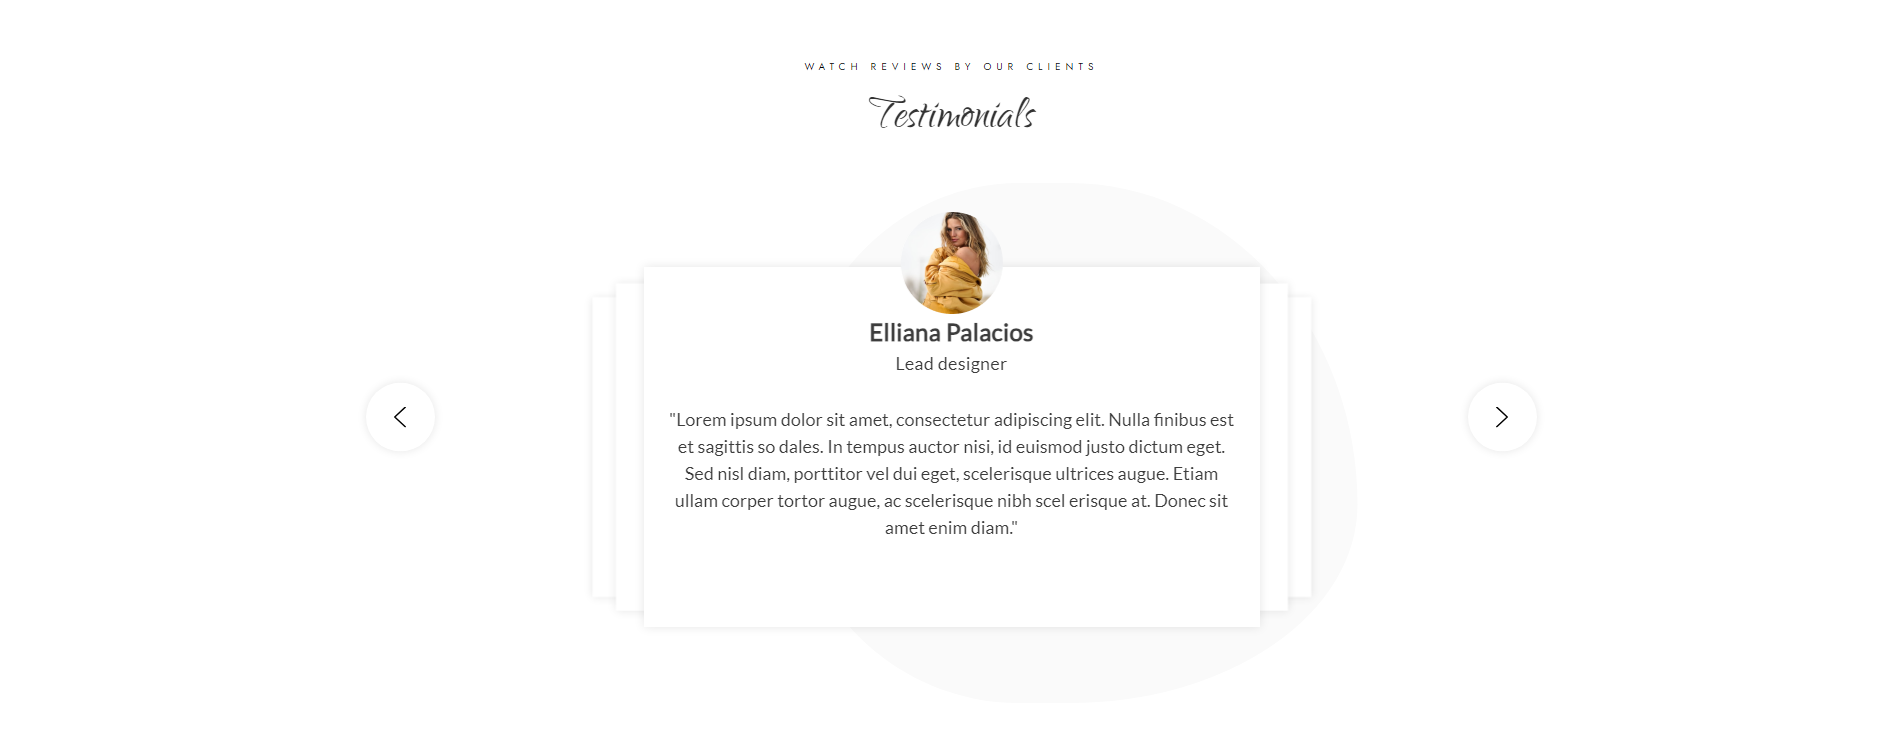
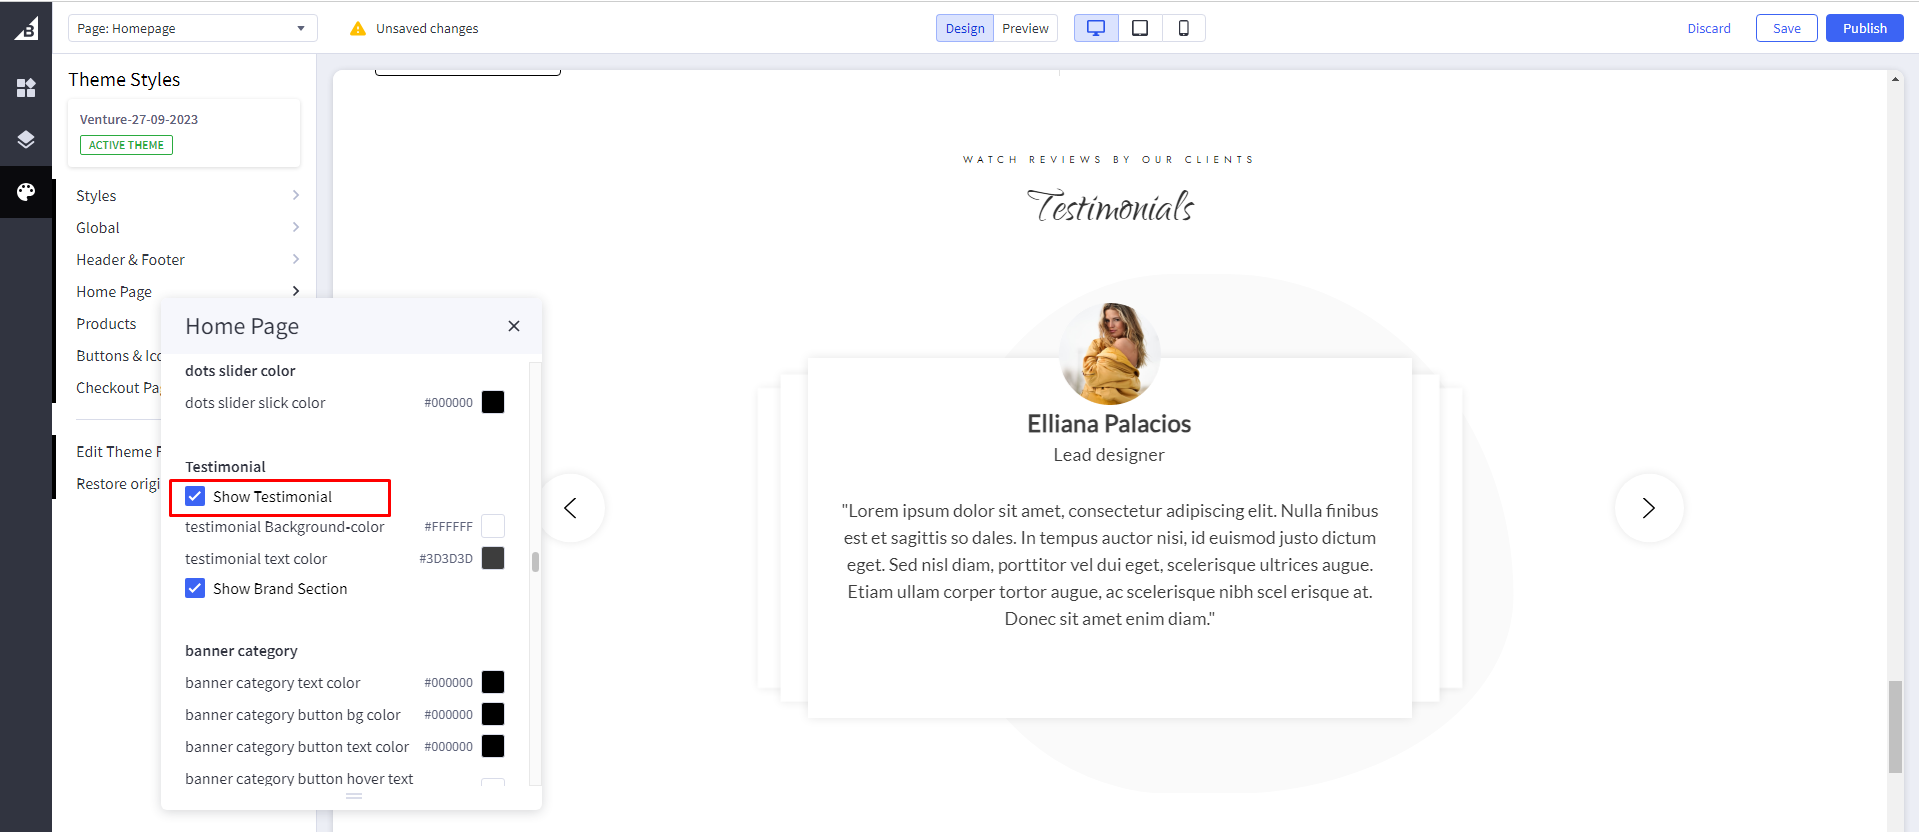
Show Testimonial section: Toggles the visibility of the Show Testimonial.

For below changes Go to channels > Themes > Advanced > Edit Theme Files > lang > en.json.
Testimonial Heading: Update heading in testimonial > heading & subheading
Testimonial Image: Add Image URL in firstimageicon to thirdimageicon.
Testimonial author name: Add author name in firstdesignation to thirddesignation.
Testimonial author designation: Add author designation in firstdesignation to thirddesignation.
Instagram Section
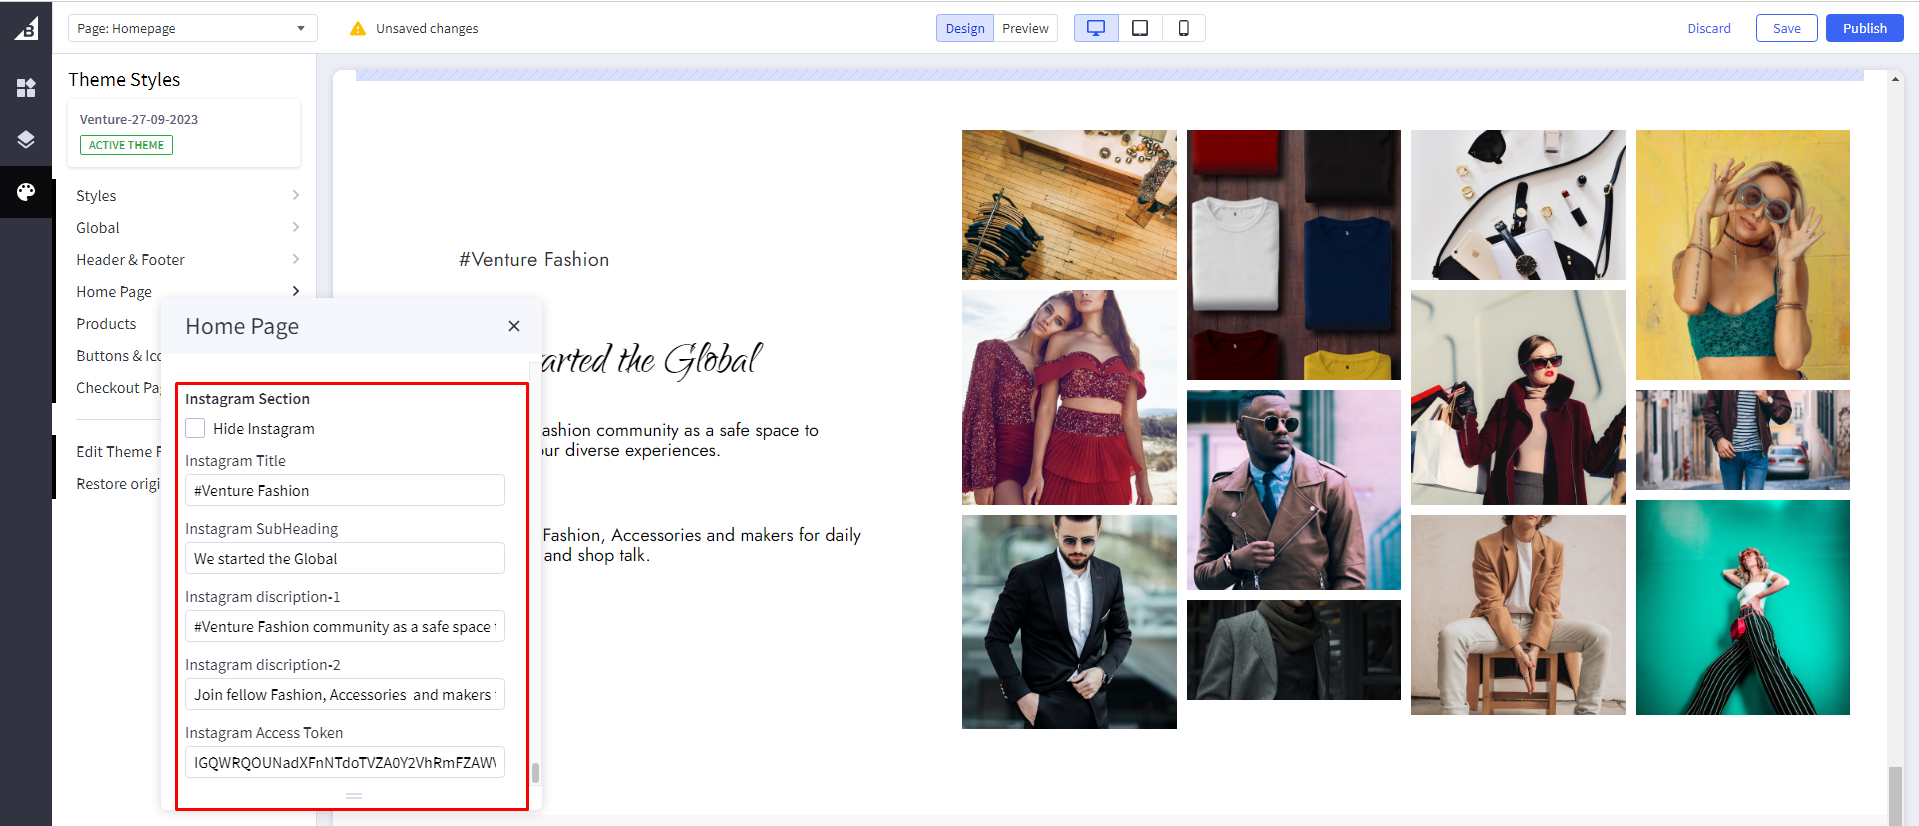
This section shows instagram posts you have uploaded in your instagram business account.
Hide instagram: toggles the visibility of this section
You can add/remove/replace Instagram title and sub-heading
Instagram Token :add generated token in this field
Steps to generate instagram tokenNote: This token will get expired after 30 days so it has to be re-created. Steps to re-generate instagram token
Category page
banner on category page will come from marketing banner :

You have to create a banner, add an image and assign it to a particular category in which you want to show the image :
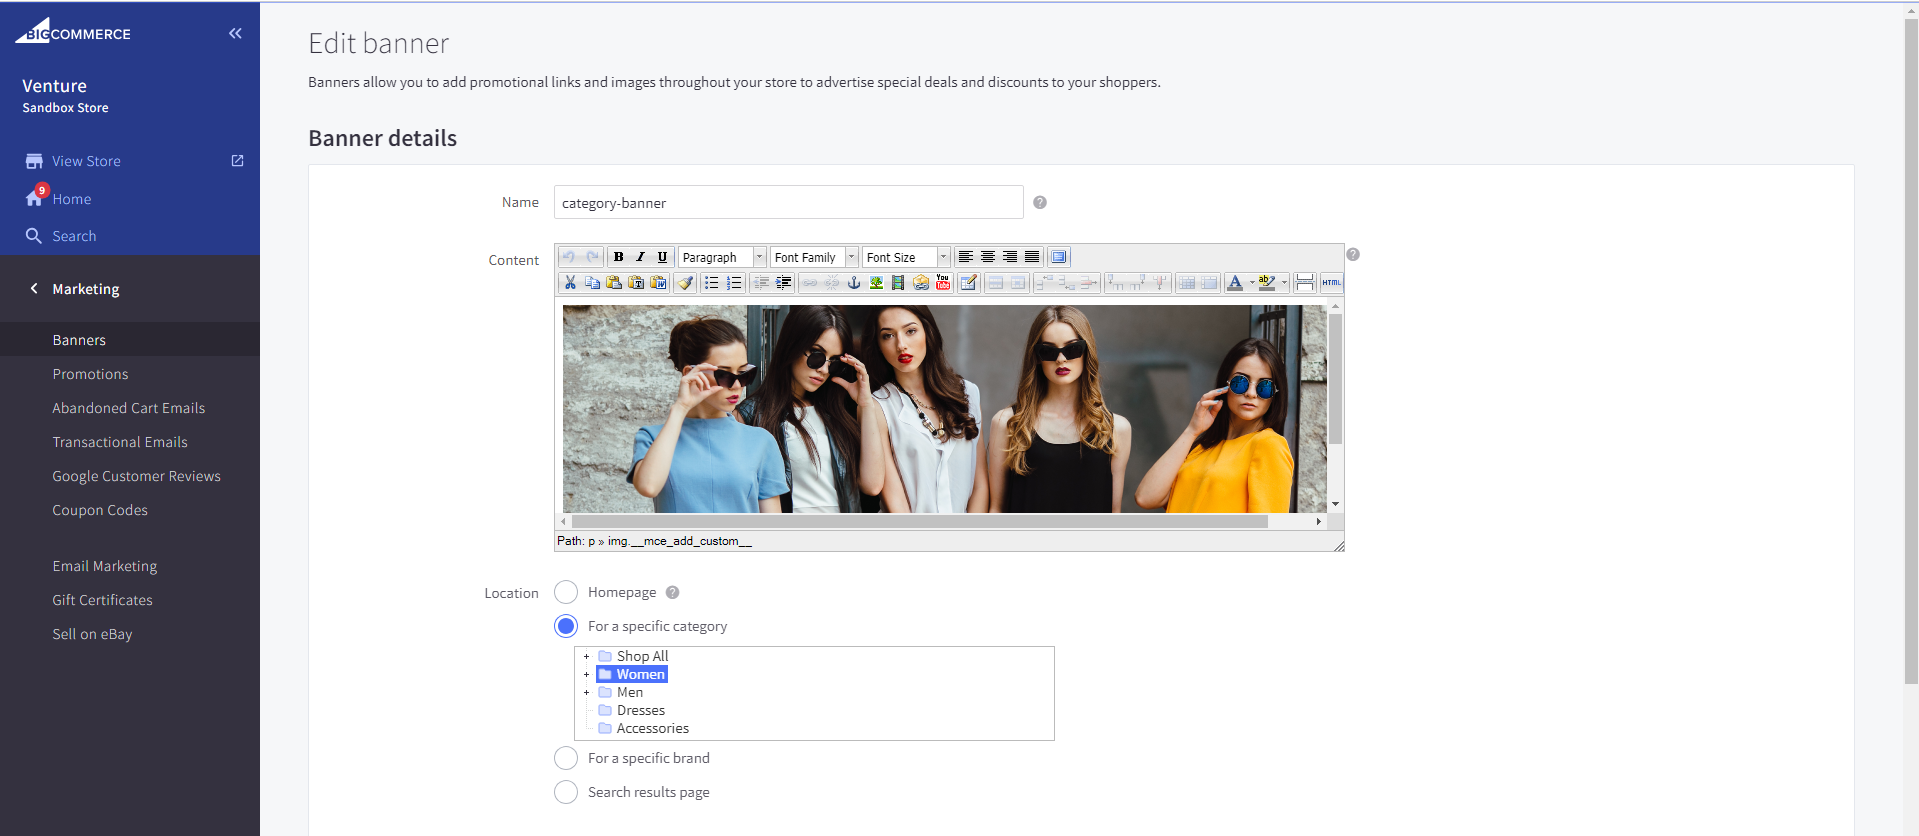
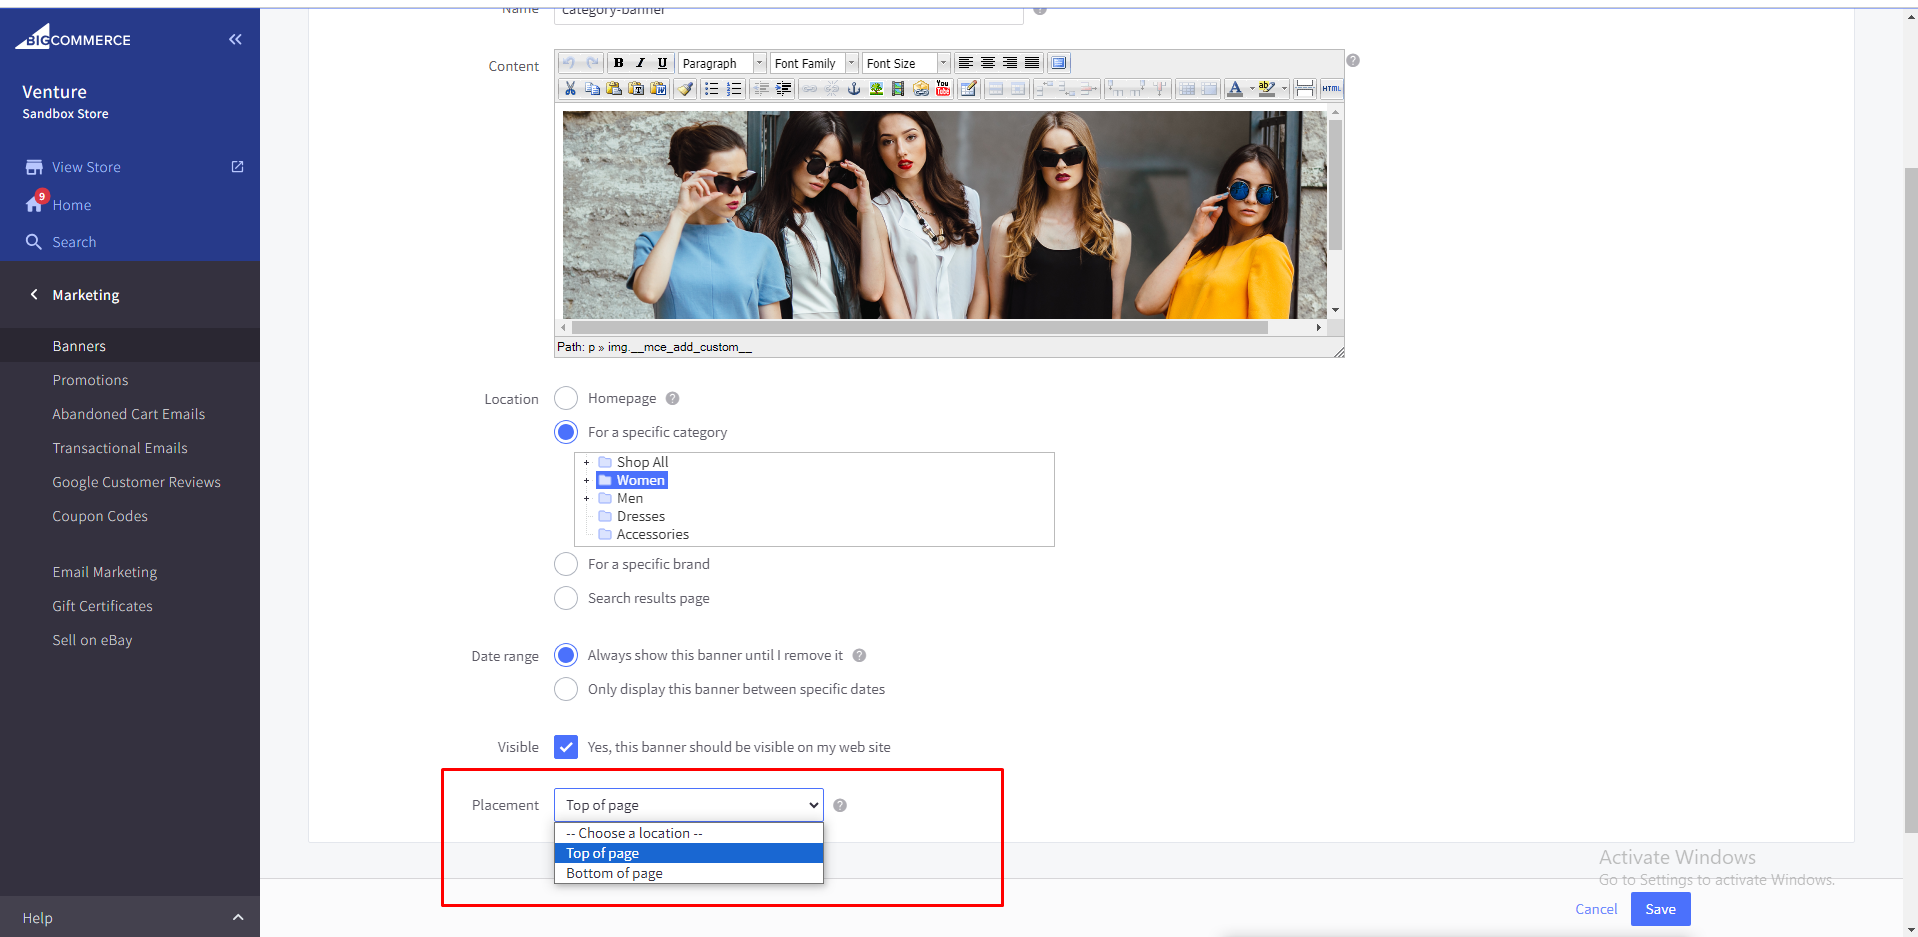
Set Position: Set Banner position in Placement DropDown
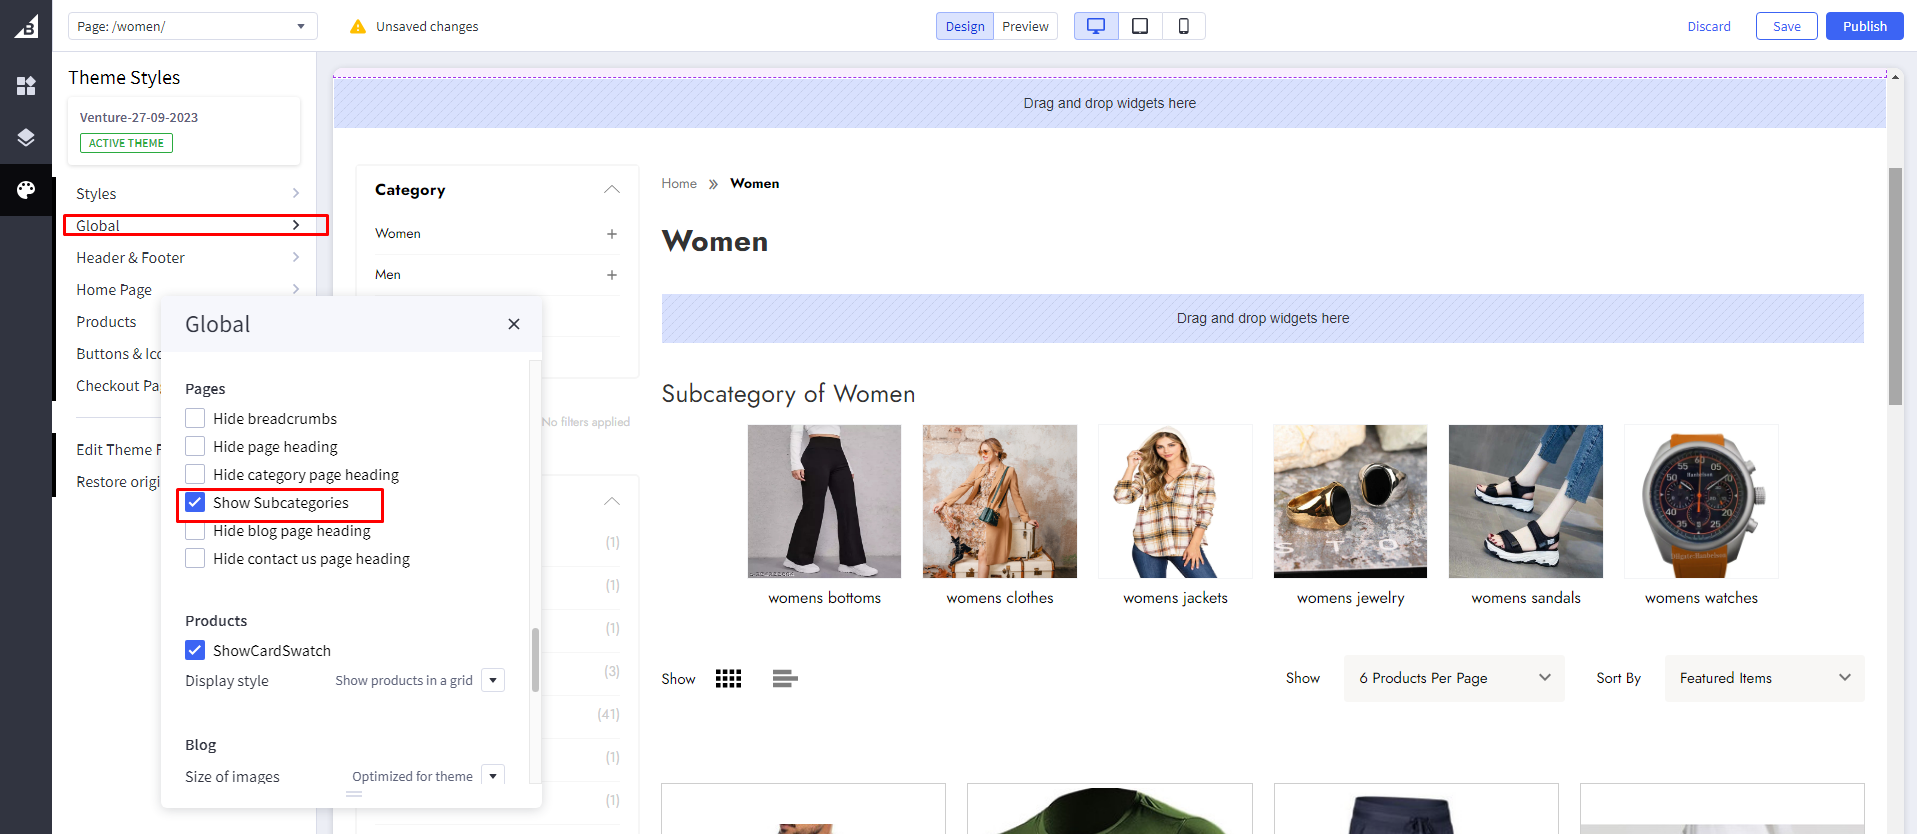
All the subcategories will be visible on it parent category page with its category image like this : 
You can turn on and turn off subcategories from the theme settings.

Manage List view / Grid View for category page.
Grid View: 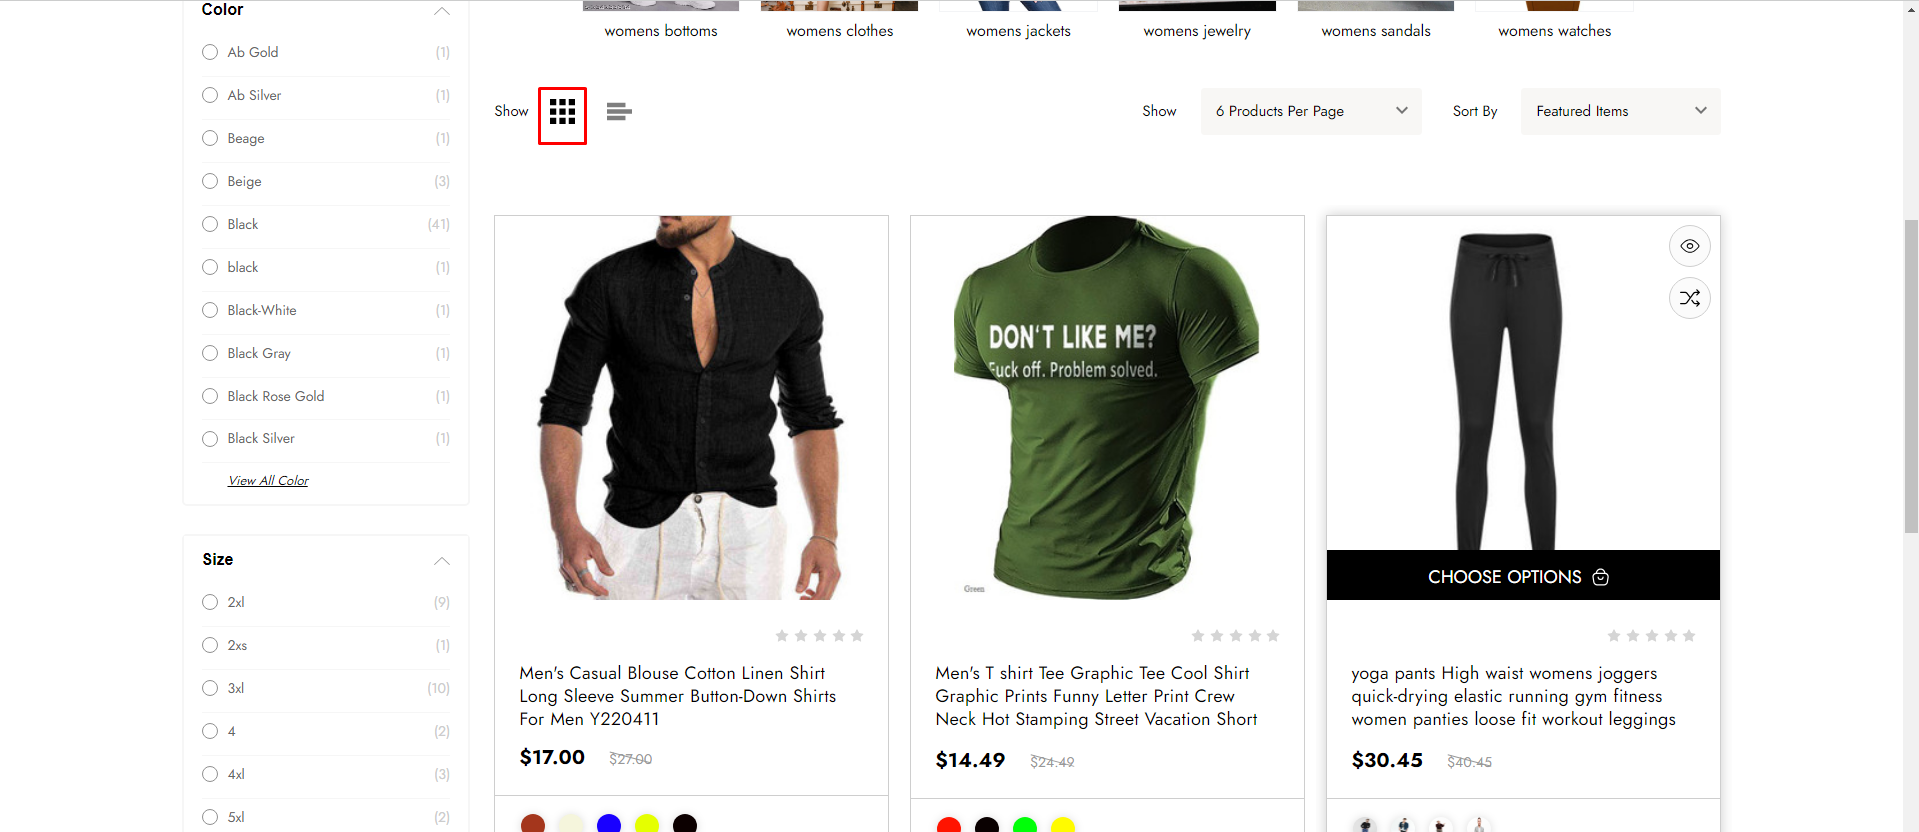 List view:
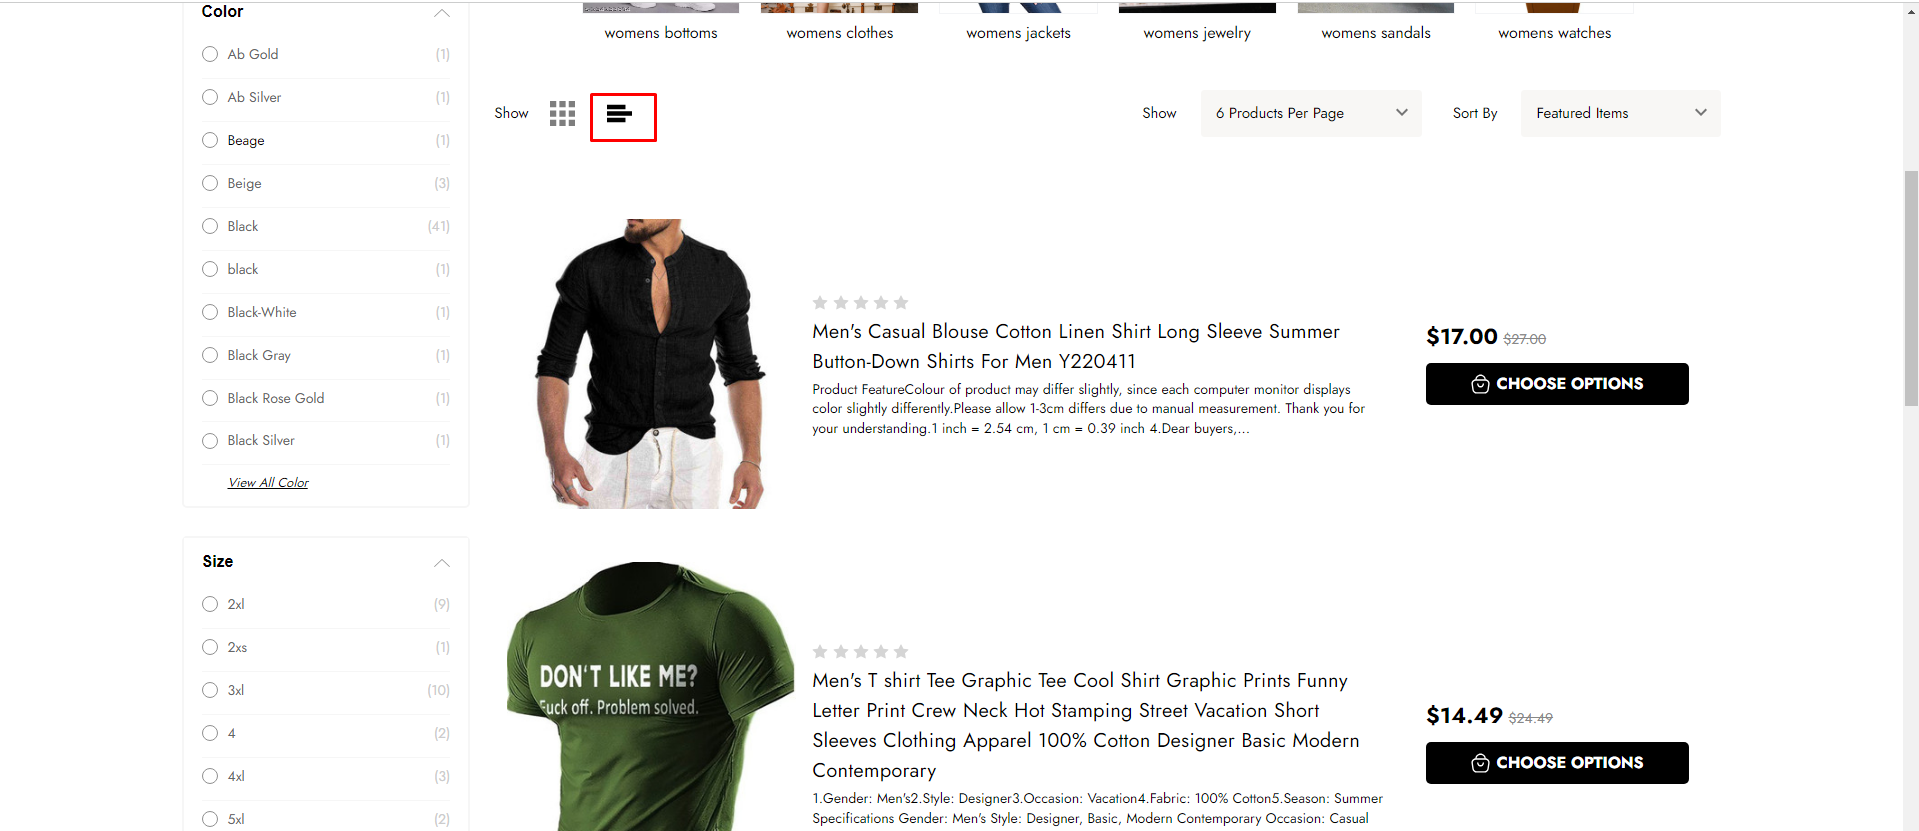
Sidebar Image 
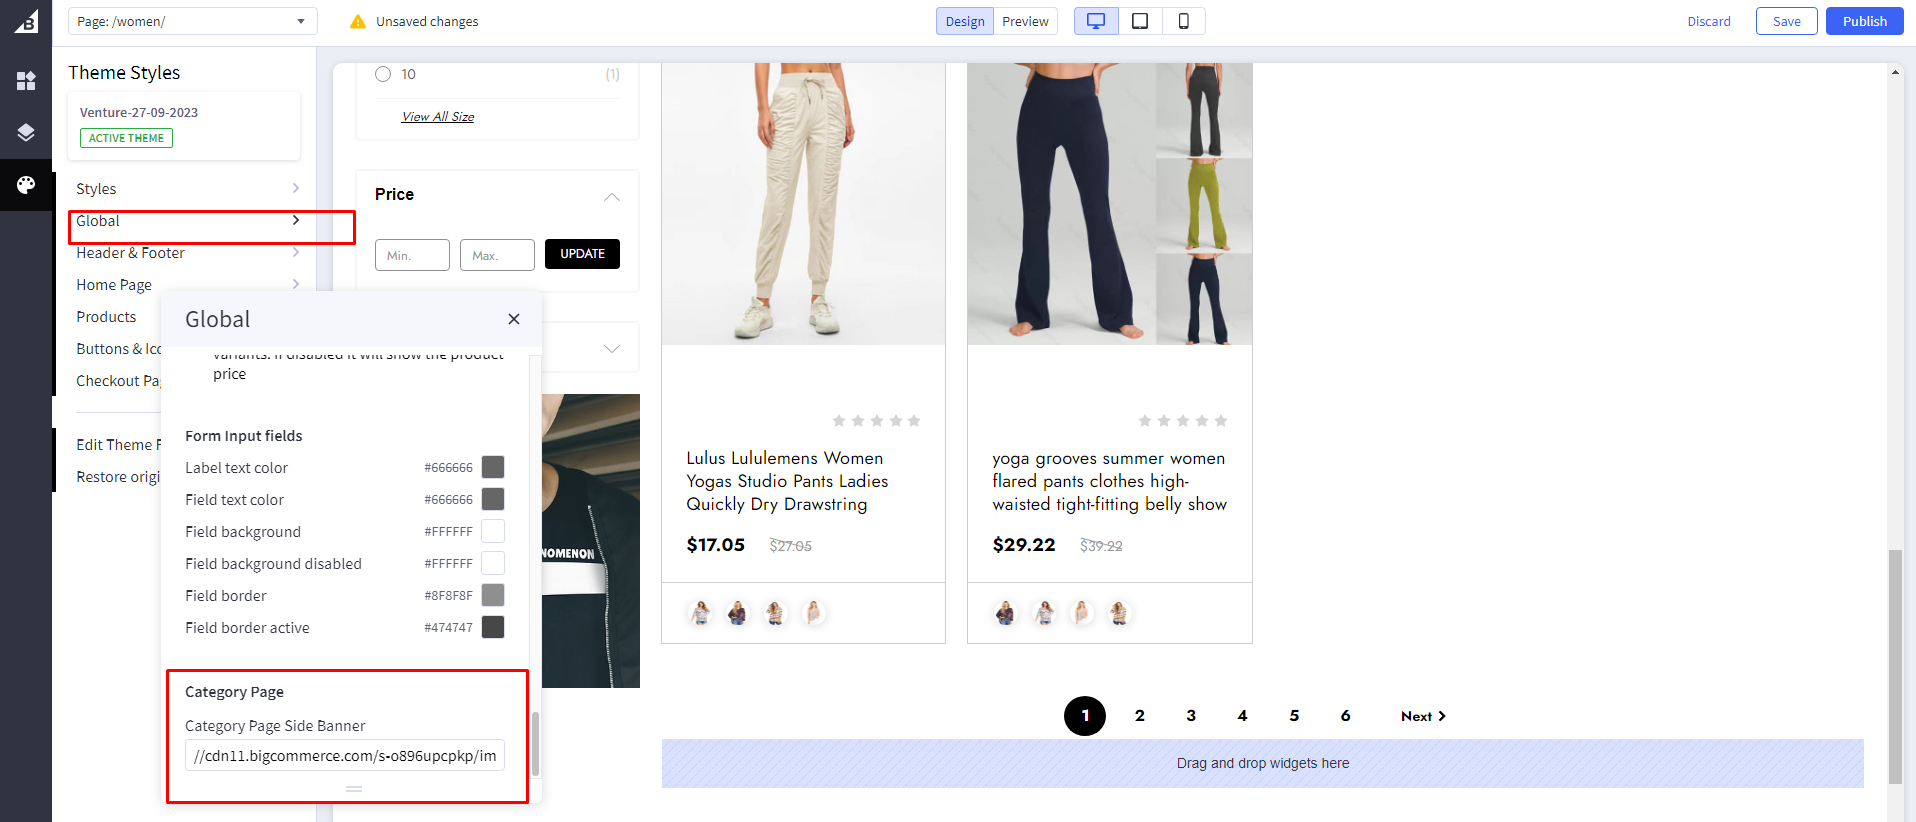
Category sidebar Image: Add Image path in Category Page Side Banner.
Product Page
Display settings
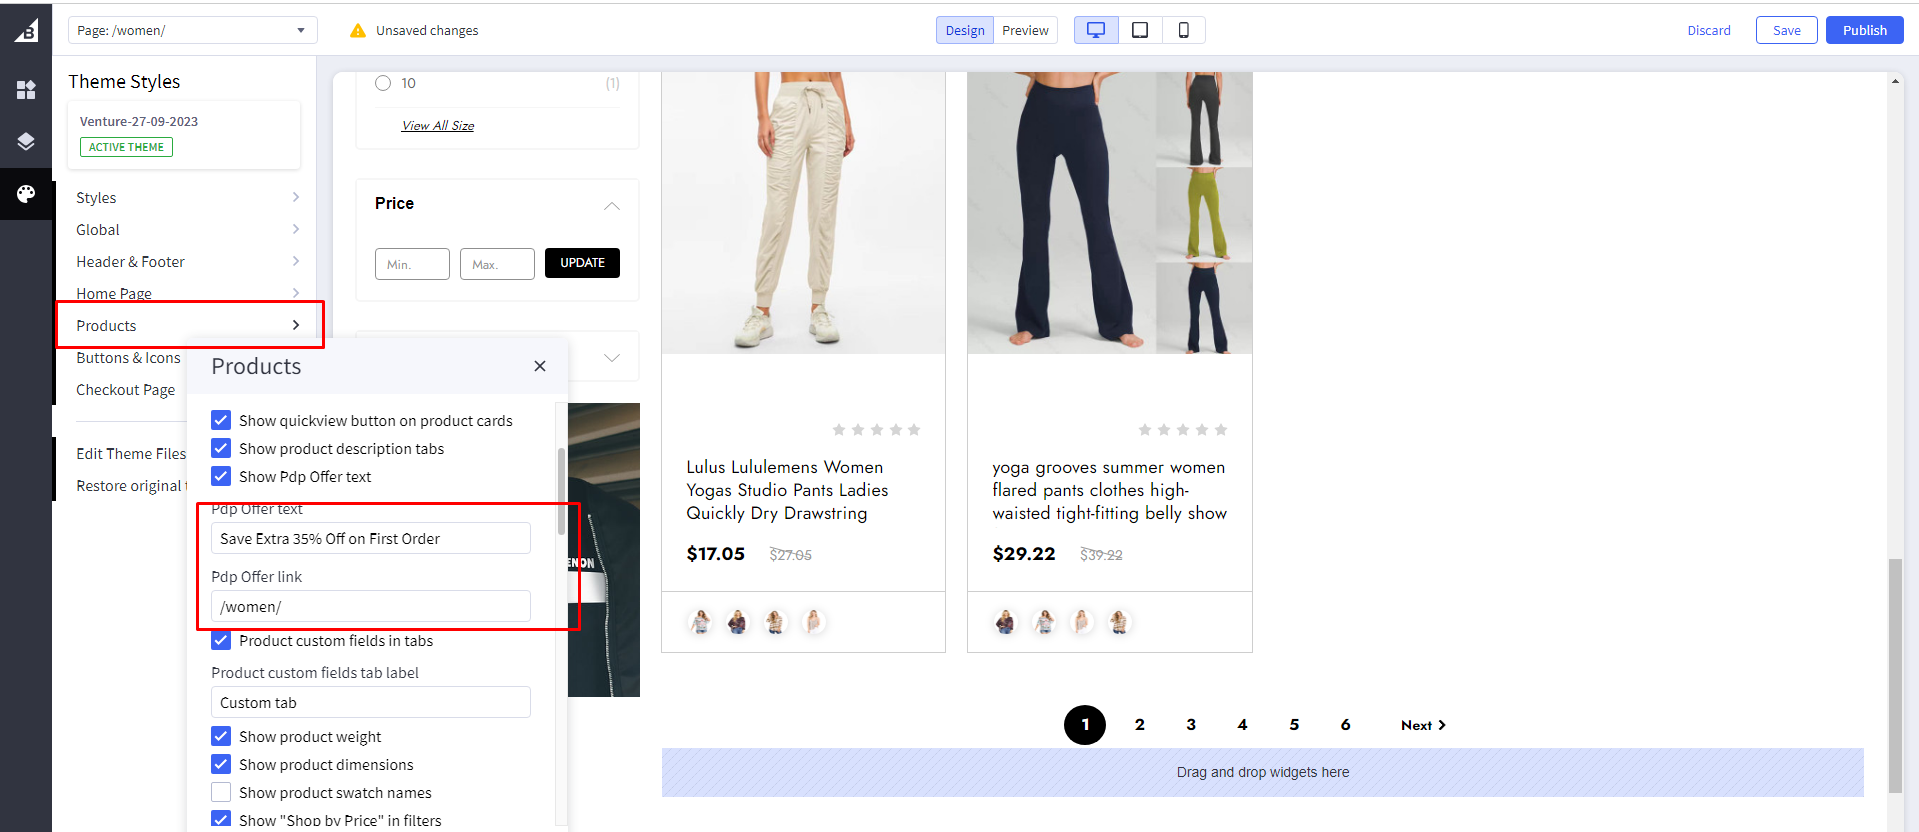
Show Offer Text: Toggles the visibility of Show Pdp Offer text.
Offer Text: Add Text in Pdp Offer text. I.e.. Save Extra 35% Off on First Order
Offer Text Link: Add page link in Pdp Offer link.
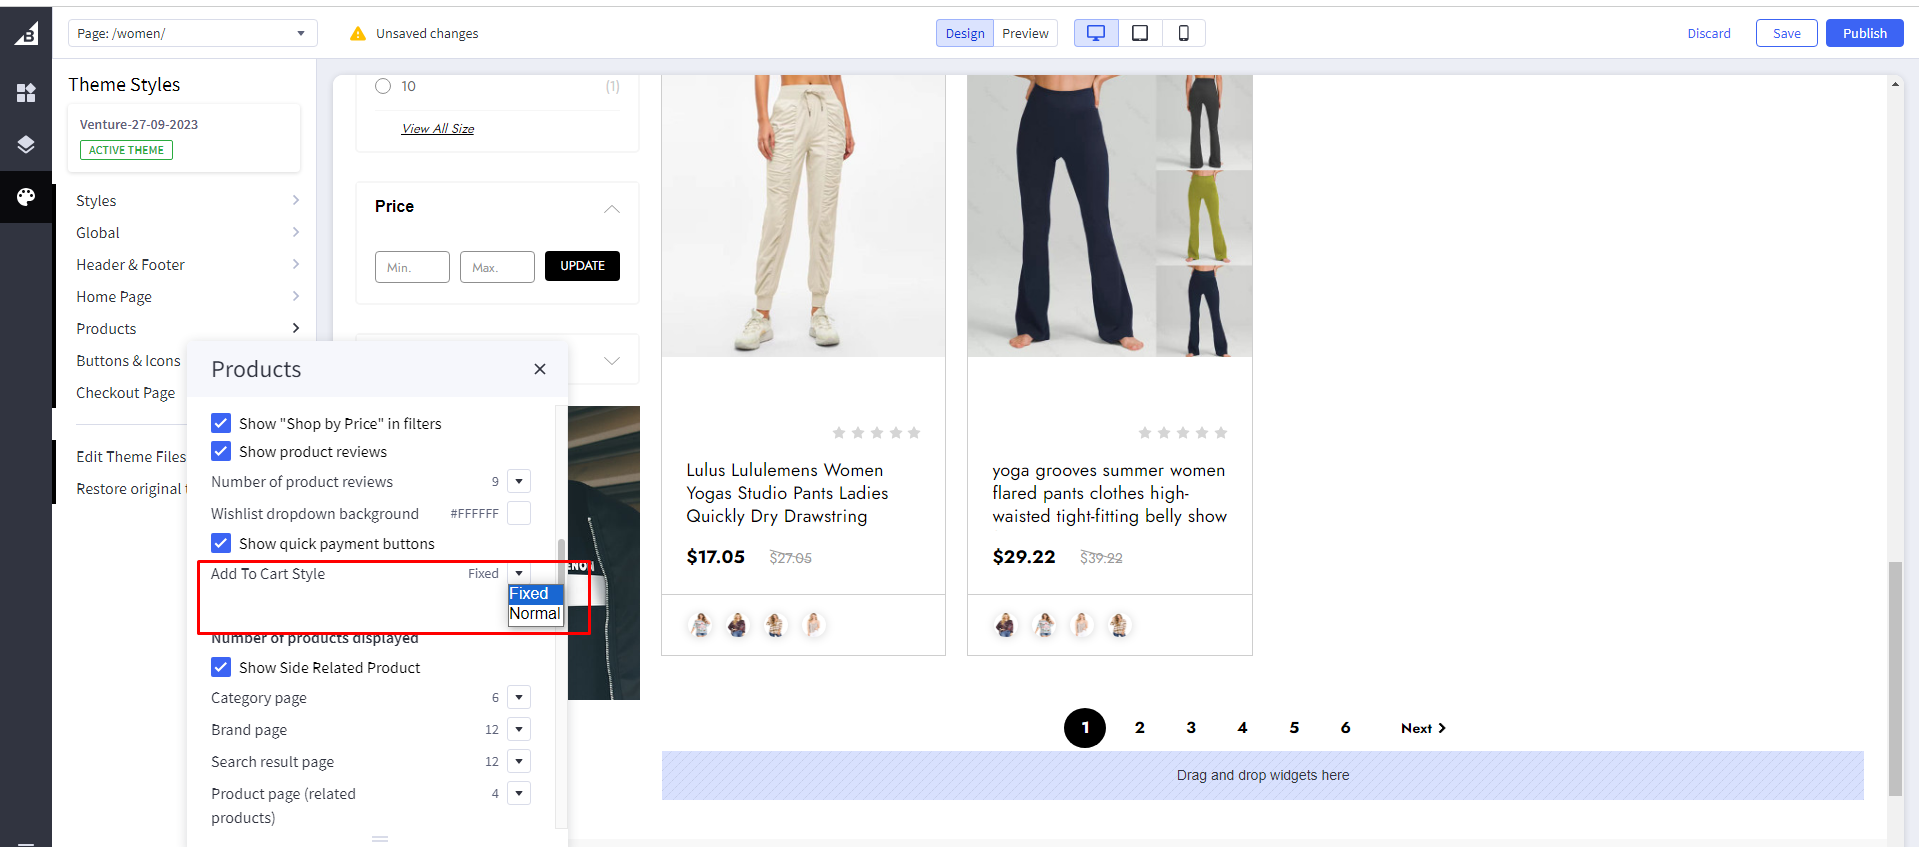
Add To Cart Style: Select style of Add to Cart button for fixed or Normal.
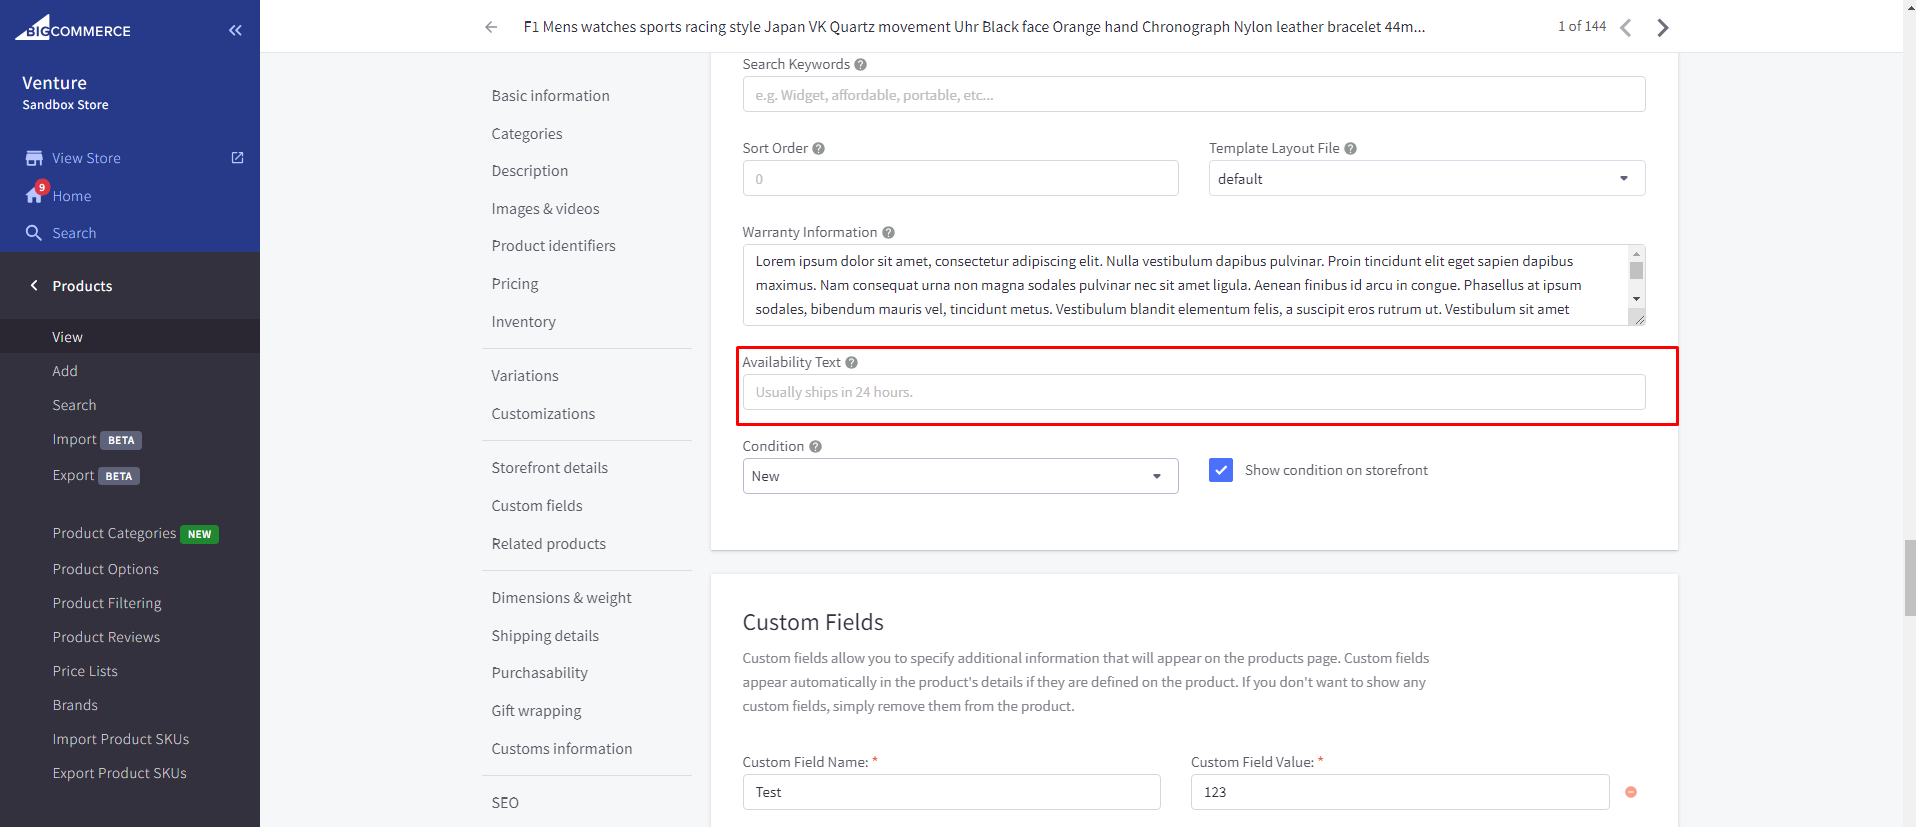
Show product Availability: Add Availability text in “Availability Text “ from product Admin.

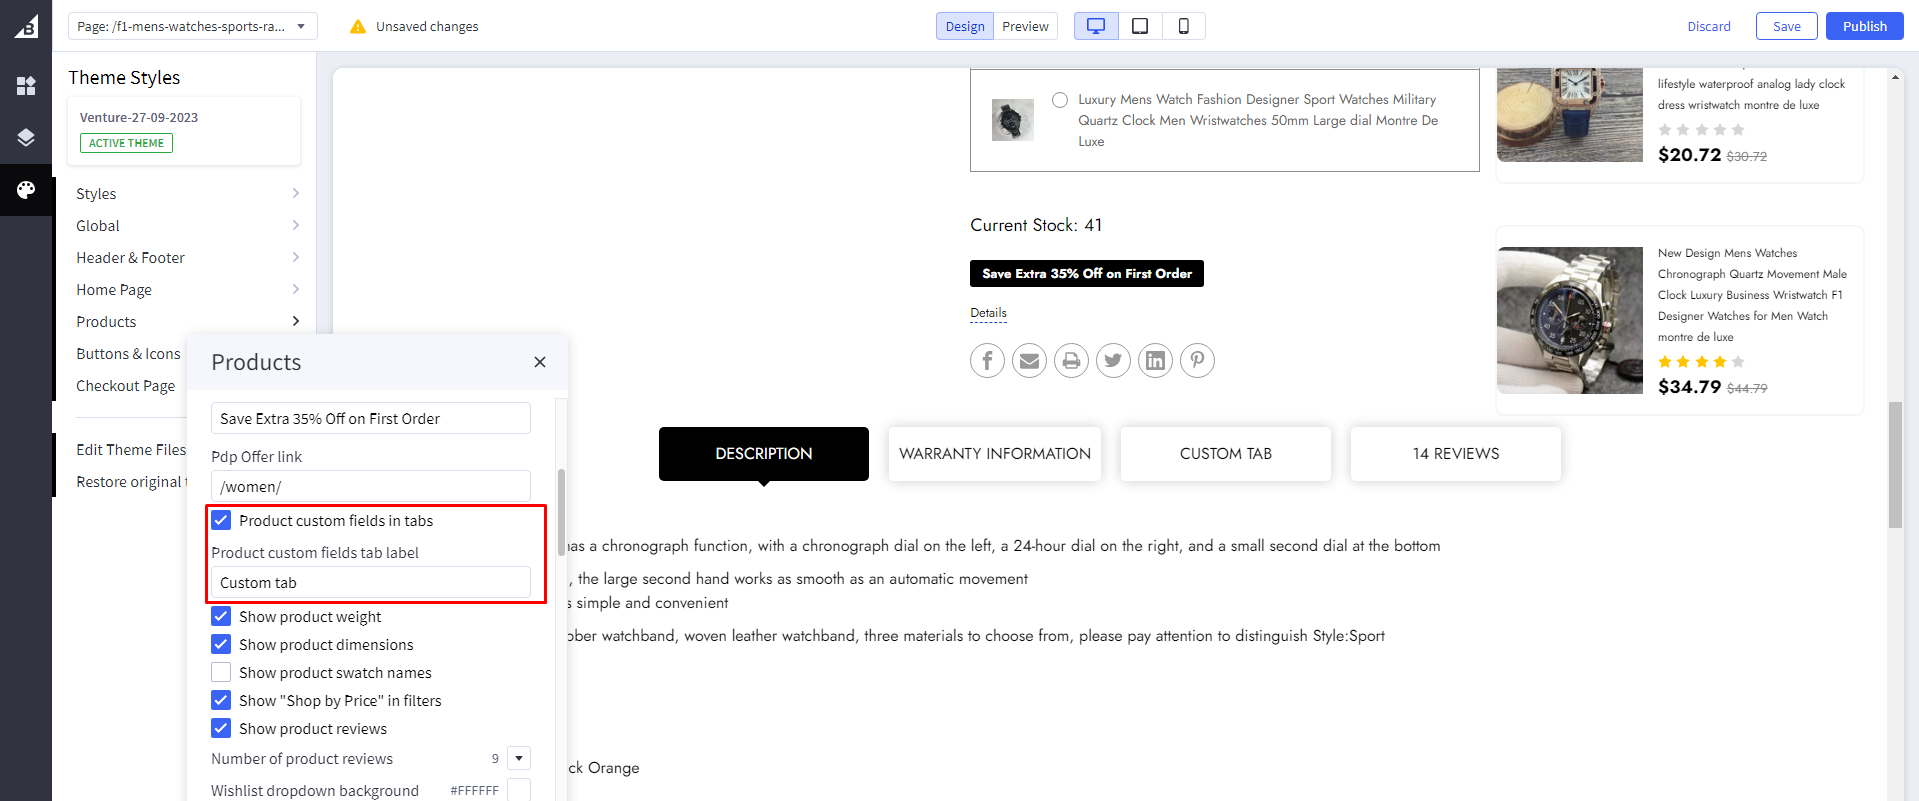
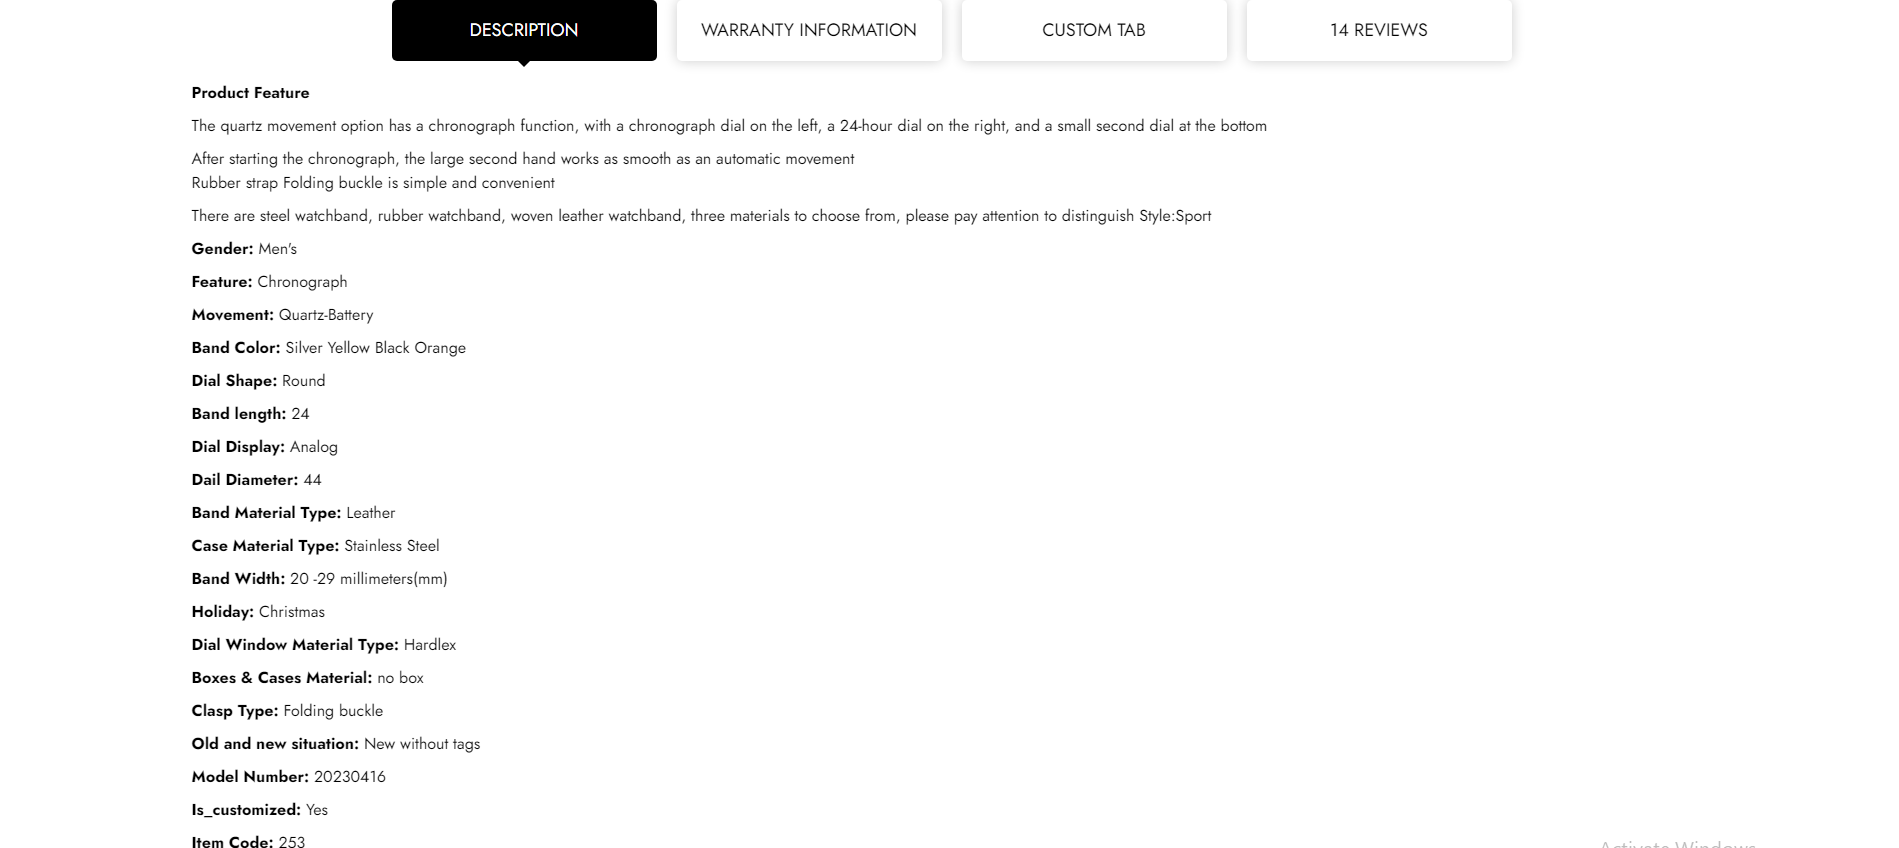
Show custom field: Toggles the visibility of Product custom fields in tabs.
Custom Field Tab Name: Add tab name in Product custom fields tab label.
Product Description Tab: Add Description of product.
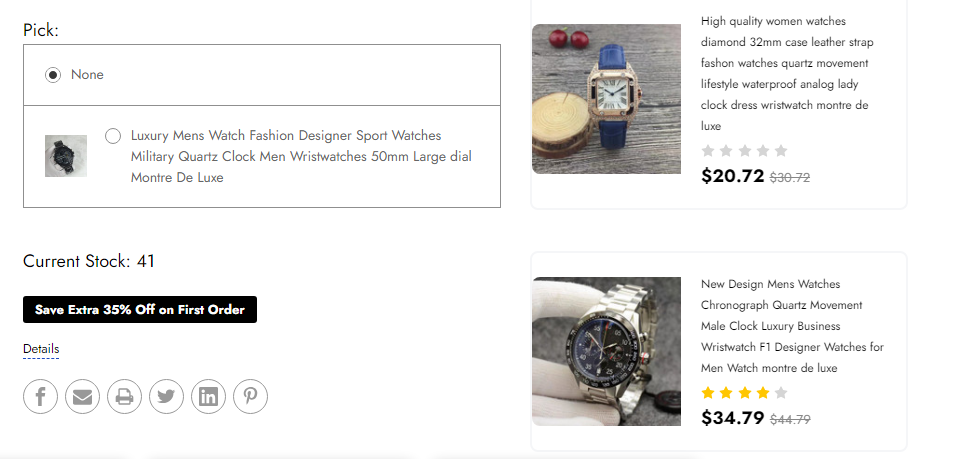
Make It Bundle Section: 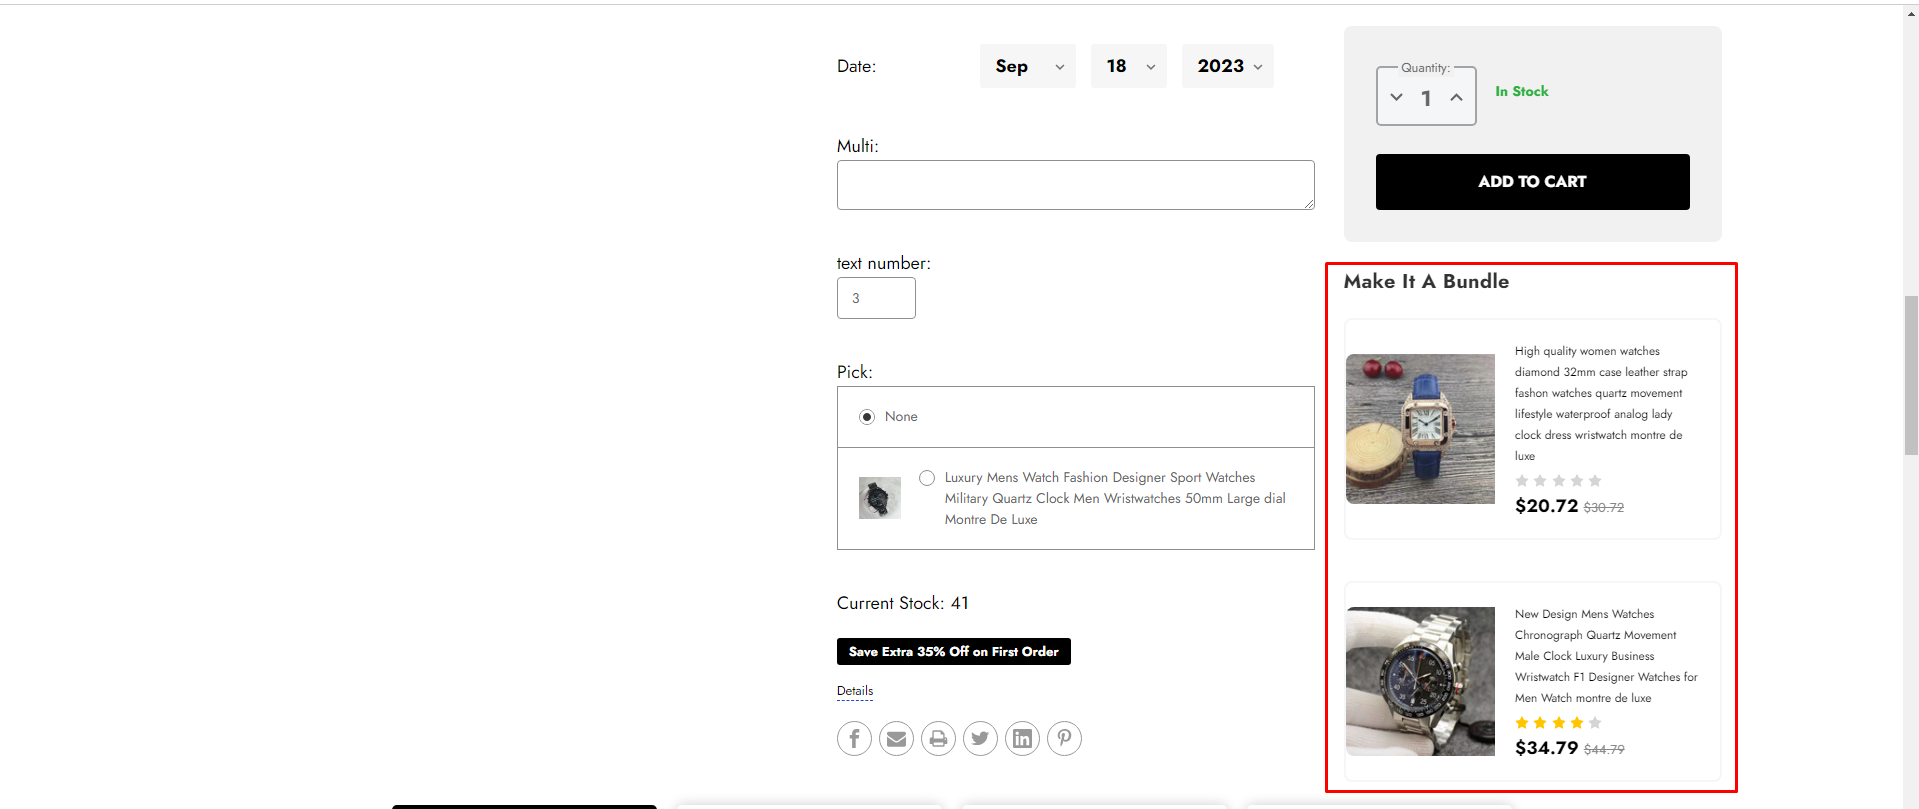
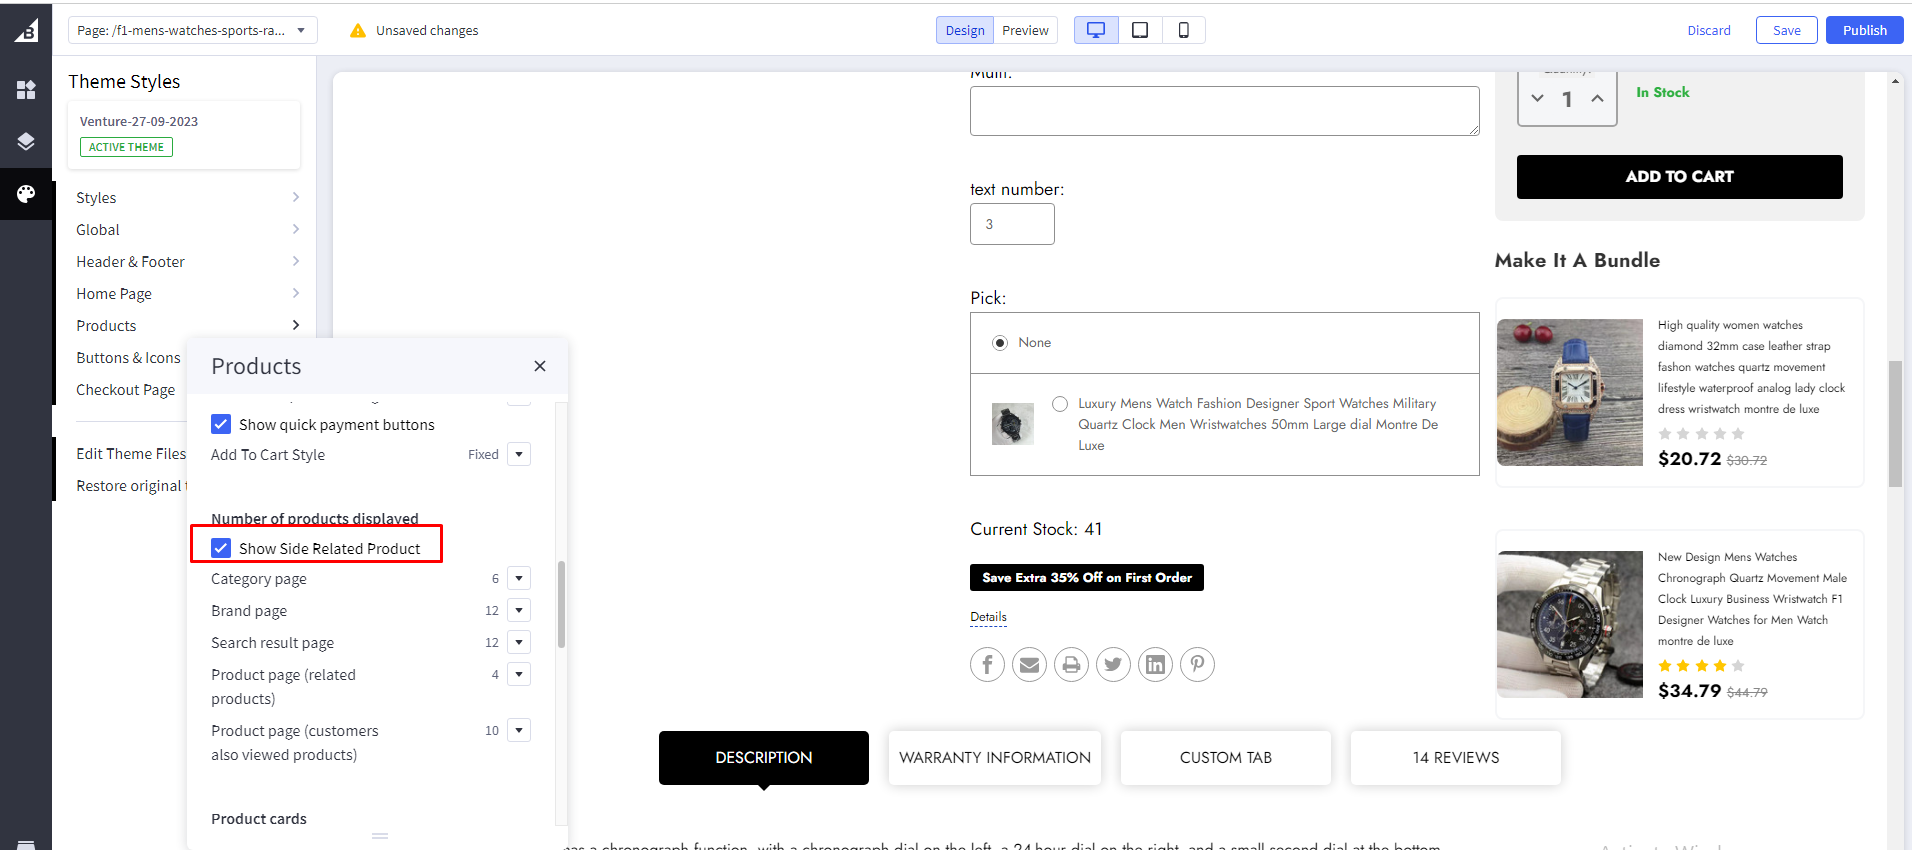
Show Make It Bundle: Toggles the visibility of Show Side Related Product.
Note:
- All other settings and features are the same as cornerstone theme.
- All images are added in Storefront > Image Manager, that's why it will show broken elements when you first upload the theme in your store.Steps to add image in Image Manager is mentioned above in USP section.
Image Dimension
Venture Fashion Variant :
Hero Carousel Image: 1920px X 600px
Category images:
first category image 506px X 530px
Second category image 507px X 235px
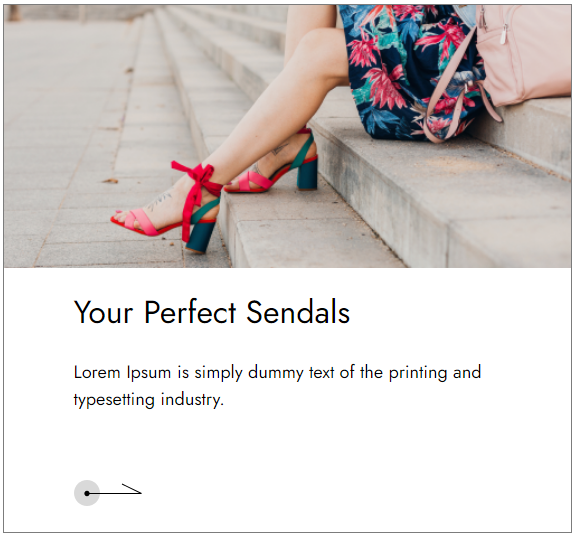
Third category image 810px X 285px
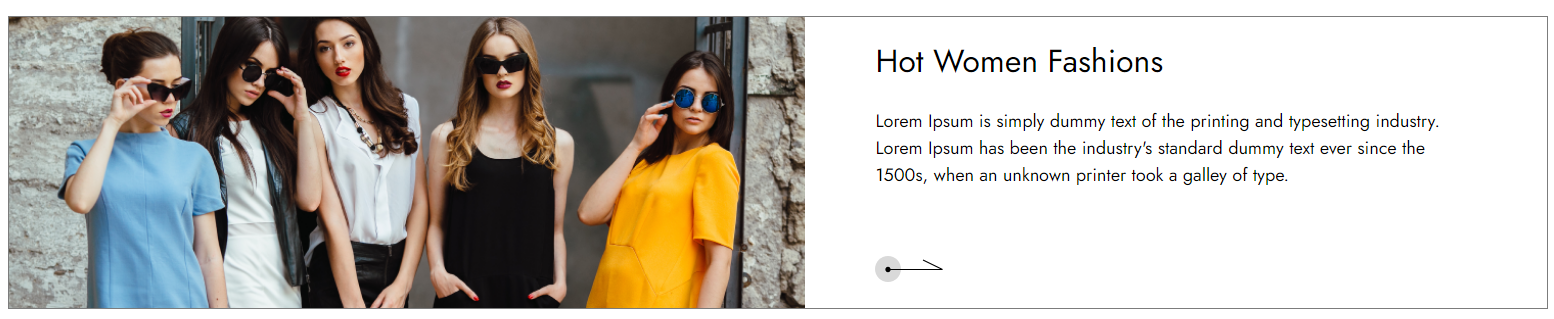
Banner Category images: 754px X 591px
Shop the look images:
Main images: 770px X 770px
Brand section images:127px X 86px

About our story video & image only height 405px
Testimonial images: 60px X 60px